Long time readers of this blog will know that I am a proponent of the powerful version control system Git (along with the eponymous insult) and will likely have encountered one of my previous posts (full of witty git-centric wordplay) on the topic.
GitHub is one of the world’s most popular Git-based platforms for collaborative software development, enabling developers from around the globe to work together and contribute to open-source projects. One of the fundamental skills to master for those wanting to start using GitHub is creating a pull request.
In this guide, I am going to walk you through the step-by-step process of making a pull request with GitHub. The only things that I am going to assume is that you have Git installed, have some basic familiarity with Git and a GitHub account.
If you need to install Git, you can download it from the official website https://git-scm.com/downloads and if you don’t have a GitHub account, you can sign up at https://github.com/join.
The video linked above shows the key steps in making a pull request using Git and GitHub, while the extended guide below provides a little more background and detail. Enjoy 🍿
Branching in Git
Let’s start with a quick recap on branching, merging branches, and the parallels between these tasks and pull requests.
Branching is a fundamental concept in Git that allows you to work on different features, fixes, or experiments in isolation. I have previously covered branching in detail in a previous tutorial so I am not going to go into too much detail here; if you want more than a quick recap of core concepts, I recommend you check that out.
A branch in Git essentially represents a separate line of development that you can think of as an isolated workspace for making changes. When you create a new branch, it starts at the same commit as the one you branched from and moves forward as you make new commits.
Branches serve several purposes:
-
Isolation: Branches allow developers to work on different features or bug fixes simultaneously without interfering with each other’s work. Each branch maintains its own set of commits and changes.
-
Experimentation: You can use branches to experiment with new ideas or approaches. If an experiment doesn’t work out, you can simply abandon or delete the branch without affecting the main codebase.
-
Parallel Development: Branches enable parallel development of multiple features or bug fixes, making it easier to manage and coordinate work in larger teams.
Imagine that you’re working on a project for which you have already initialised a Git repository and want to add a new feature or fix a bug. You don’t want to make these changes to the main codebase directly, as it might break things or disrupt some on-going work. This is where branching comes in handy.
The key steps in the branching workflow are as follows:
Step 1: Make a Branch and Switch to it
To create a new branch with the name you specify and switch from the default main or master branch to the newly created branch so that you can start working on it, use:
git checkout -b branch_name
Note that branch names should generally be descriptive of the task or feature you’re working on.
Step 2: Work on the New Branch
Now that you’re on your new branch (which you can verify using just git branch), you can make changes to your project files, staging and committing changes as you go, for example:
# stage changes to all modified files
git add --all

# commit changes with a descriptive message
git commit -m "Description of changes"
For a more comprehensive guide on this part of the workflow, checkout my previous tutorial on the topic.
Step 3: Push Branches to Remote (Optional)
If you’re collaborating with others or want to back up your branches on a remote repository (like GitHub), you can push your branches at any time (even before merging) using:
git push -u origin branch_name
Be sure to replace branch_name with the name of your branch and origin with the name of your remote repository.
Step 4: Merge Branches
Once you’ve completed your work on a branch and it’s ready to be included in the main project, you can merge it back into the main branch.
First, ensure you’re on the branch where you want to merge the changes (e.g., main). You can switch between branches at any time using the git checkout command.
git checkout main
Now you can use the git merge command to merge the feature branch into the main branch:
git merge branch_name
Git will prompt you to resolve any merge conflicts manually if it can’t automatically merge the changes.
Make sure that you commit the merge changes with a meaningful message.
Step 5: Delete Branches (Optional)
After merging a feature branch into the main branch or when a branch is no longer needed, you can delete it to keep your repository tidy. Use the following command to delete a branch:
git branch -d branch_name
Note: The -d flag stands for “delete” and will only delete fully merged branches. To forcefully delete a branch, even if it’s not fully merged, use the -D flag instead.
Merging Branches vs Pull Requests
Now that you know how to create, manage, and use branches in Git, we can draw some parallels with pull requests to help you understand what they are and how they work.
While merging and pull requests are both common operations in Git that are used to incorporate changes from one branch into another, typically from a feature or topic branch into a main or master branch, they do have some key differences and serve different purposes.
Similarities
Incorporating Changes: Both merging and pull requests are mechanisms for integrating changes made in one branch into another branch. The goal is to bring the changes together so that they are available in a common branch.
Conflict Resolution: In both cases, if there are conflicting changes between the branches being merged, Git will require the conflicts to be resolved before the merge can be completed.
Branch Preservation: Both merging and pull requests preserve the history of the branches being merged. This means that you can see the individual commits and changes made in each branch, even after they are merged.
Differences
Workflow: Merging is a direct and immediate action. You can merge one branch into another branch using commands like git merge. It typically doesn’t involve any code review process. Pull requests are a feature provided by platforms like GitHub, GitLab, and Bitbucket. They involve a two-step process: first, a contributor creates a pull request, and then, a code review is performed by peers. Once the code is reviewed and approved, it can be merged into the target branch.
Code Review: Merging does not inherently involve a formal code review process. Changes can be merged without any review, which may lead to integration issues if the code is not thoroughly tested or reviewed beforehand. Pull requests are designed to facilitate code reviews. Contributors can request feedback from other team members, and discussions can take place in the pull request comments. The code review process helps ensure code quality and maintain best practices.
Branch Clean-up: After a merge is completed, the source branch can be deleted if it is no longer needed. However, it’s not an automatic part of the process. Many platforms offer the option to automatically delete the source branch when a pull request is merged, making it easier to keep the repository clean.
Visibility and Documentation: Merges don’t provide a formal place for documentation or discussion about the changes. It’s just a technical operation to combine the branches. Pull requests often include a description, links to related issues or discussions, and a clear record of the code review process. This makes it easier to understand the context and purpose of the changes being merged.
In short, merging is a basic technical operation to combine branches and incorporating changes in Git, while pull requests are a process that includes code review, documentation, and discussion that are most often used in collaborative development workflows to ensure code quality and facilitate teamwork.
Pull Requests on GitHub
Let’s take a look at how to actually make a pull request using Git and GitHub.
In the examples shown below, I am going to go through the process of making a pull request in the nf-core/configs GitHub repository. I am NOT recommending that this repository be used as a sandbox to follow this tutorial, I am merely using it to illustrate how each stage might look in practice.
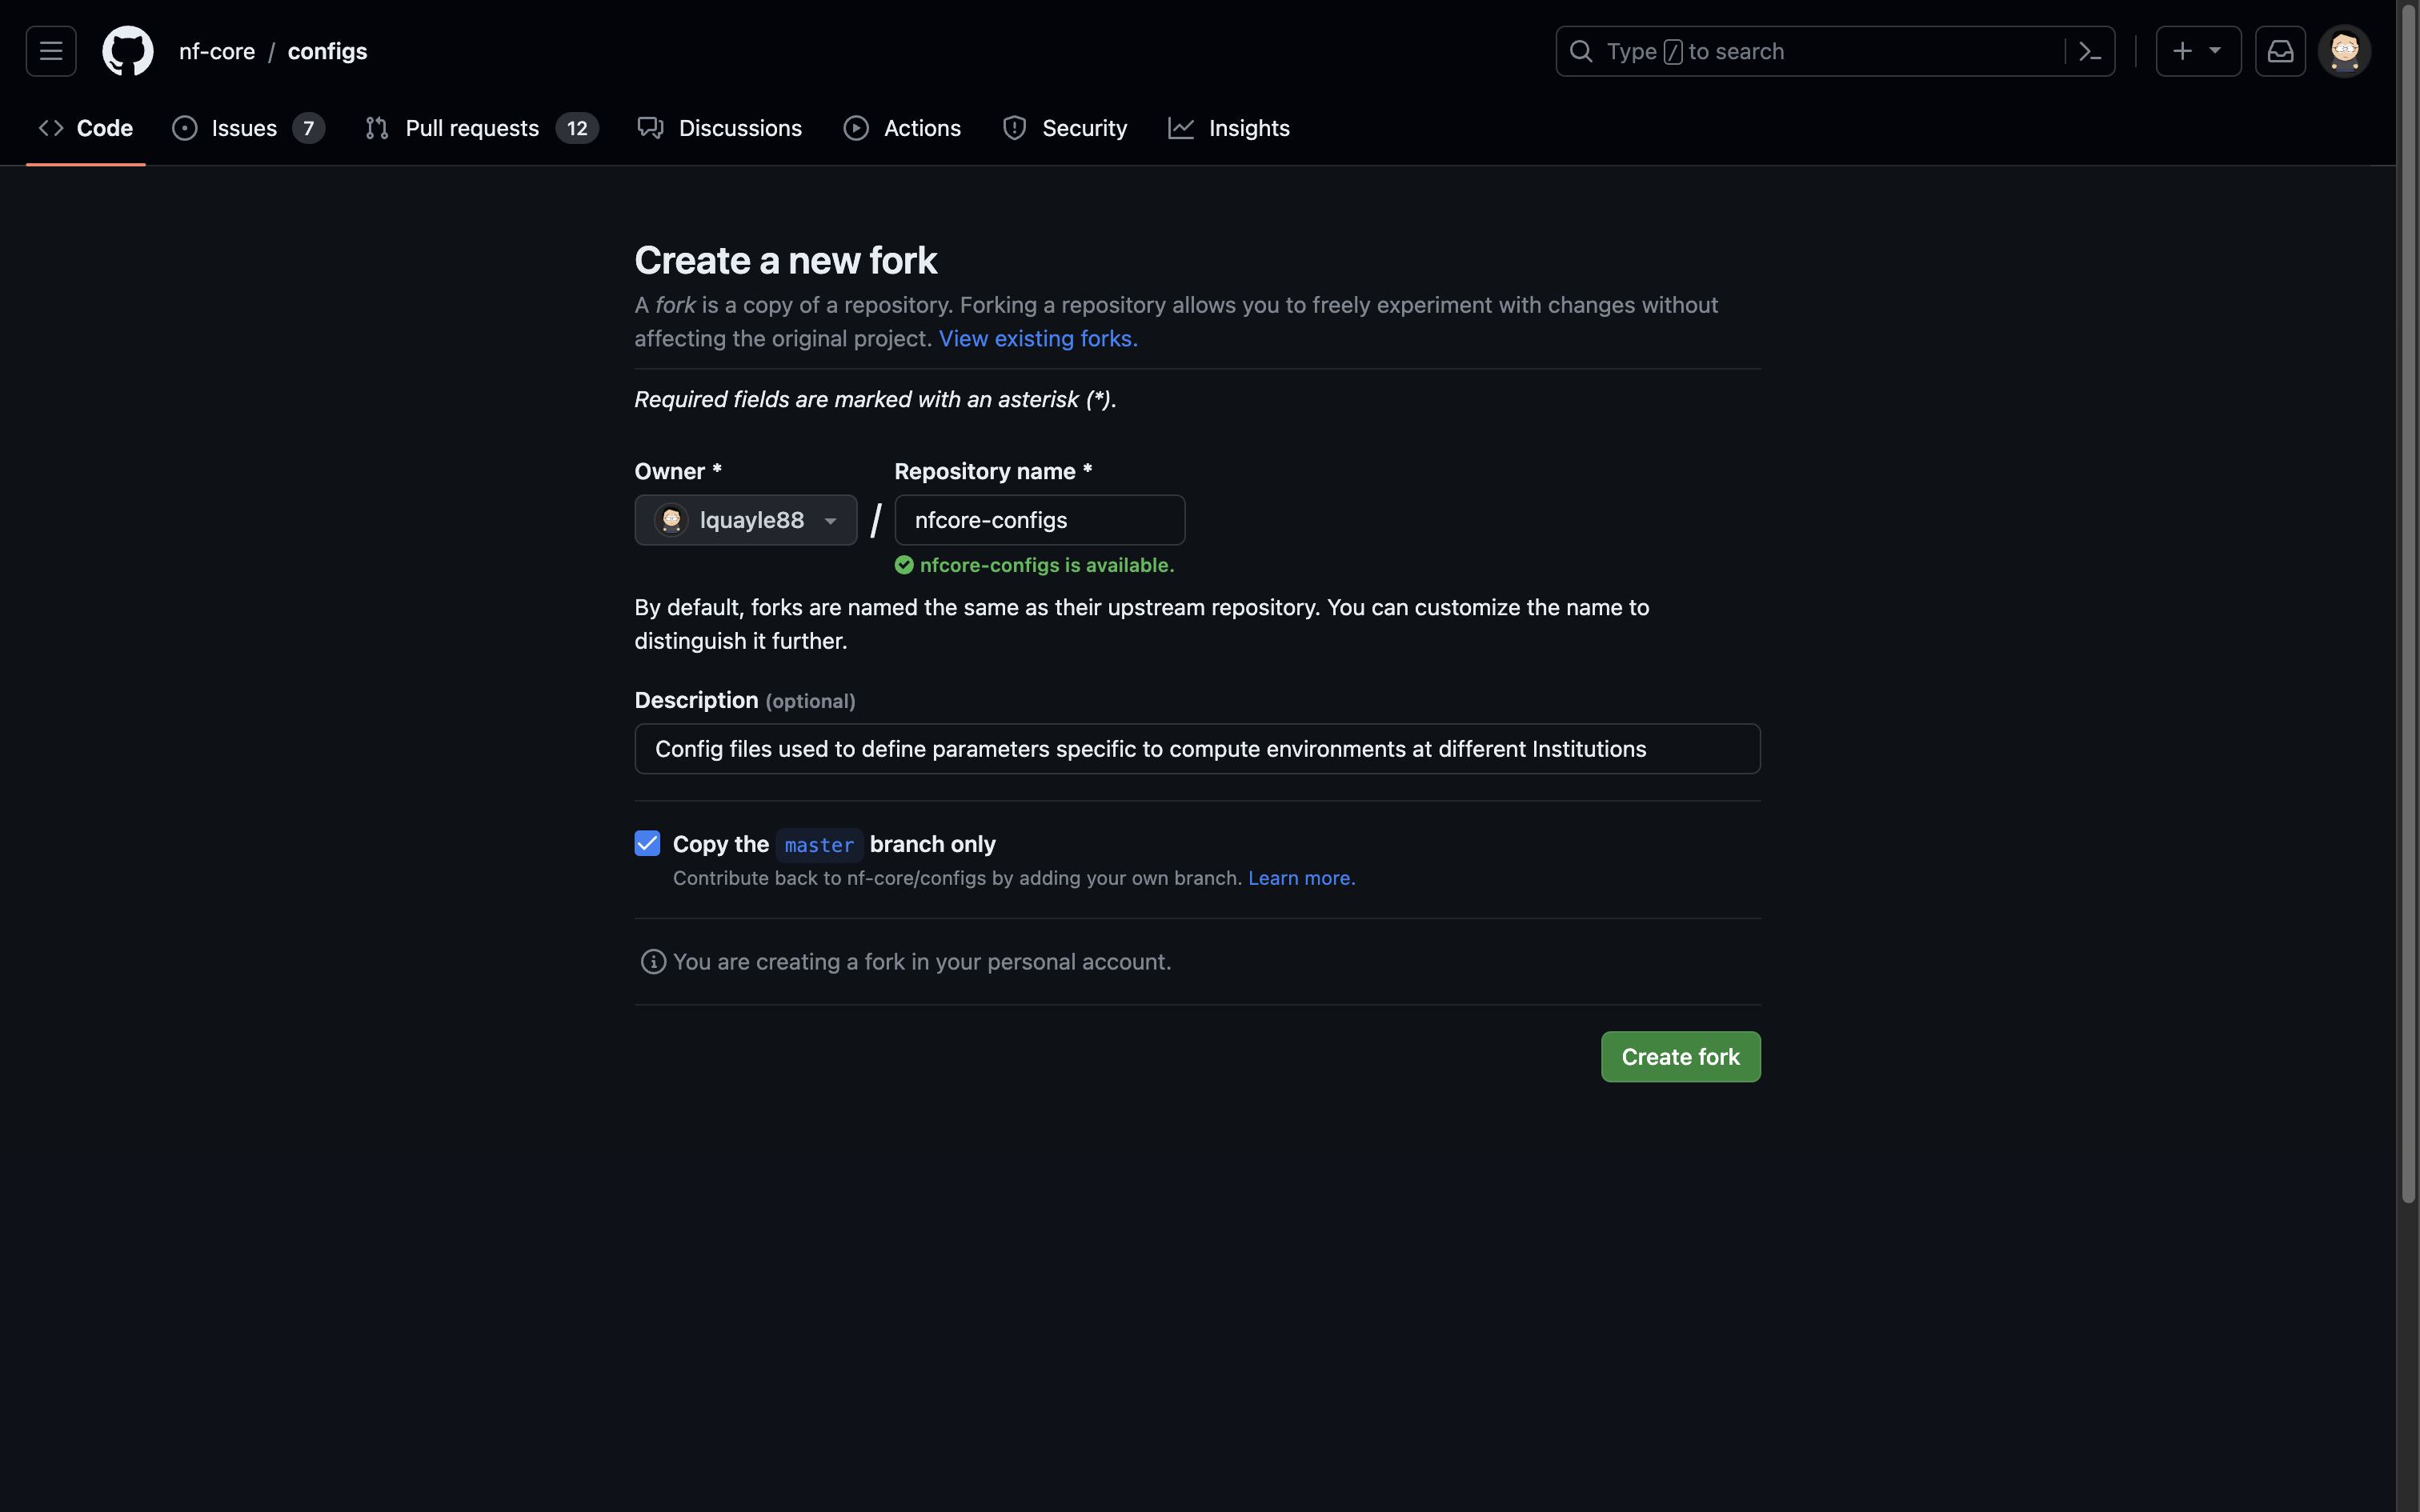
Step 1: Fork the Repository
Navigate to the GitHub repository you want to contribute to. In the upper right corner of the repository’s page, you’ll find a “Fork” button. Click it to create a copy of the repository in your GitHub account.
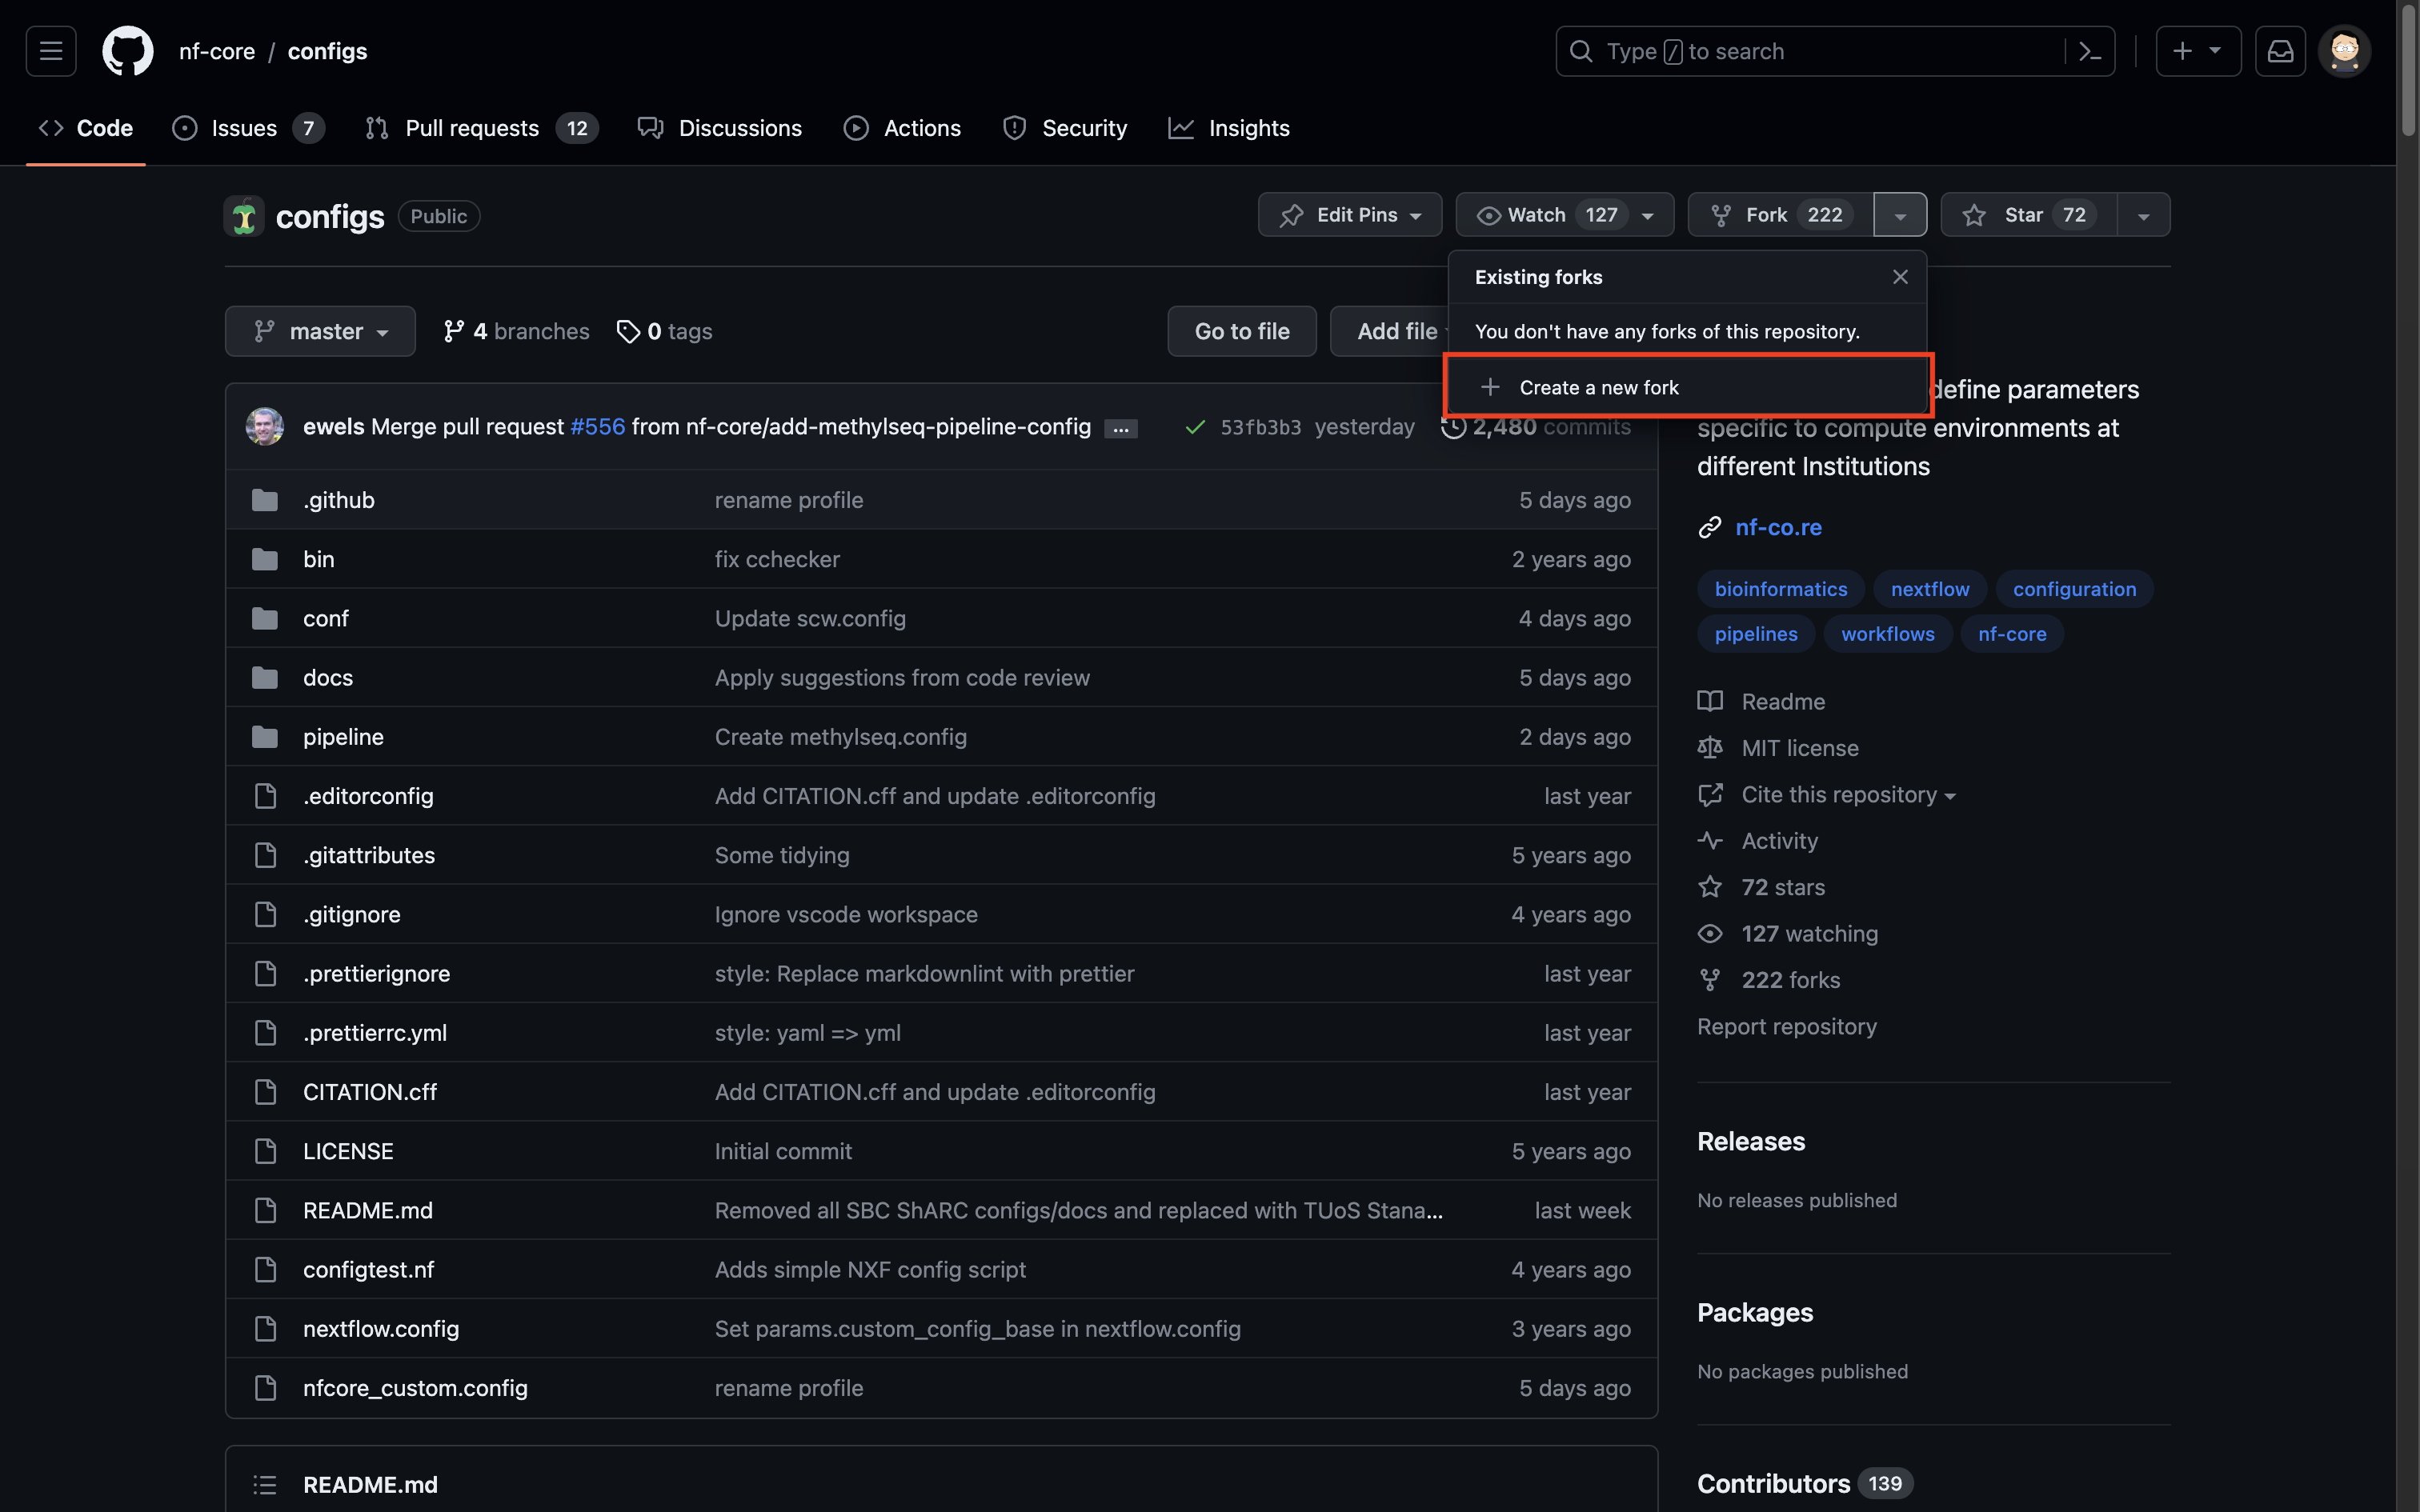 Click to Zoom
 Click to Zoom
Step 2: Clone Your Fork
On your forked repository’s page, click the green “Code” button and copy the repository’s URL
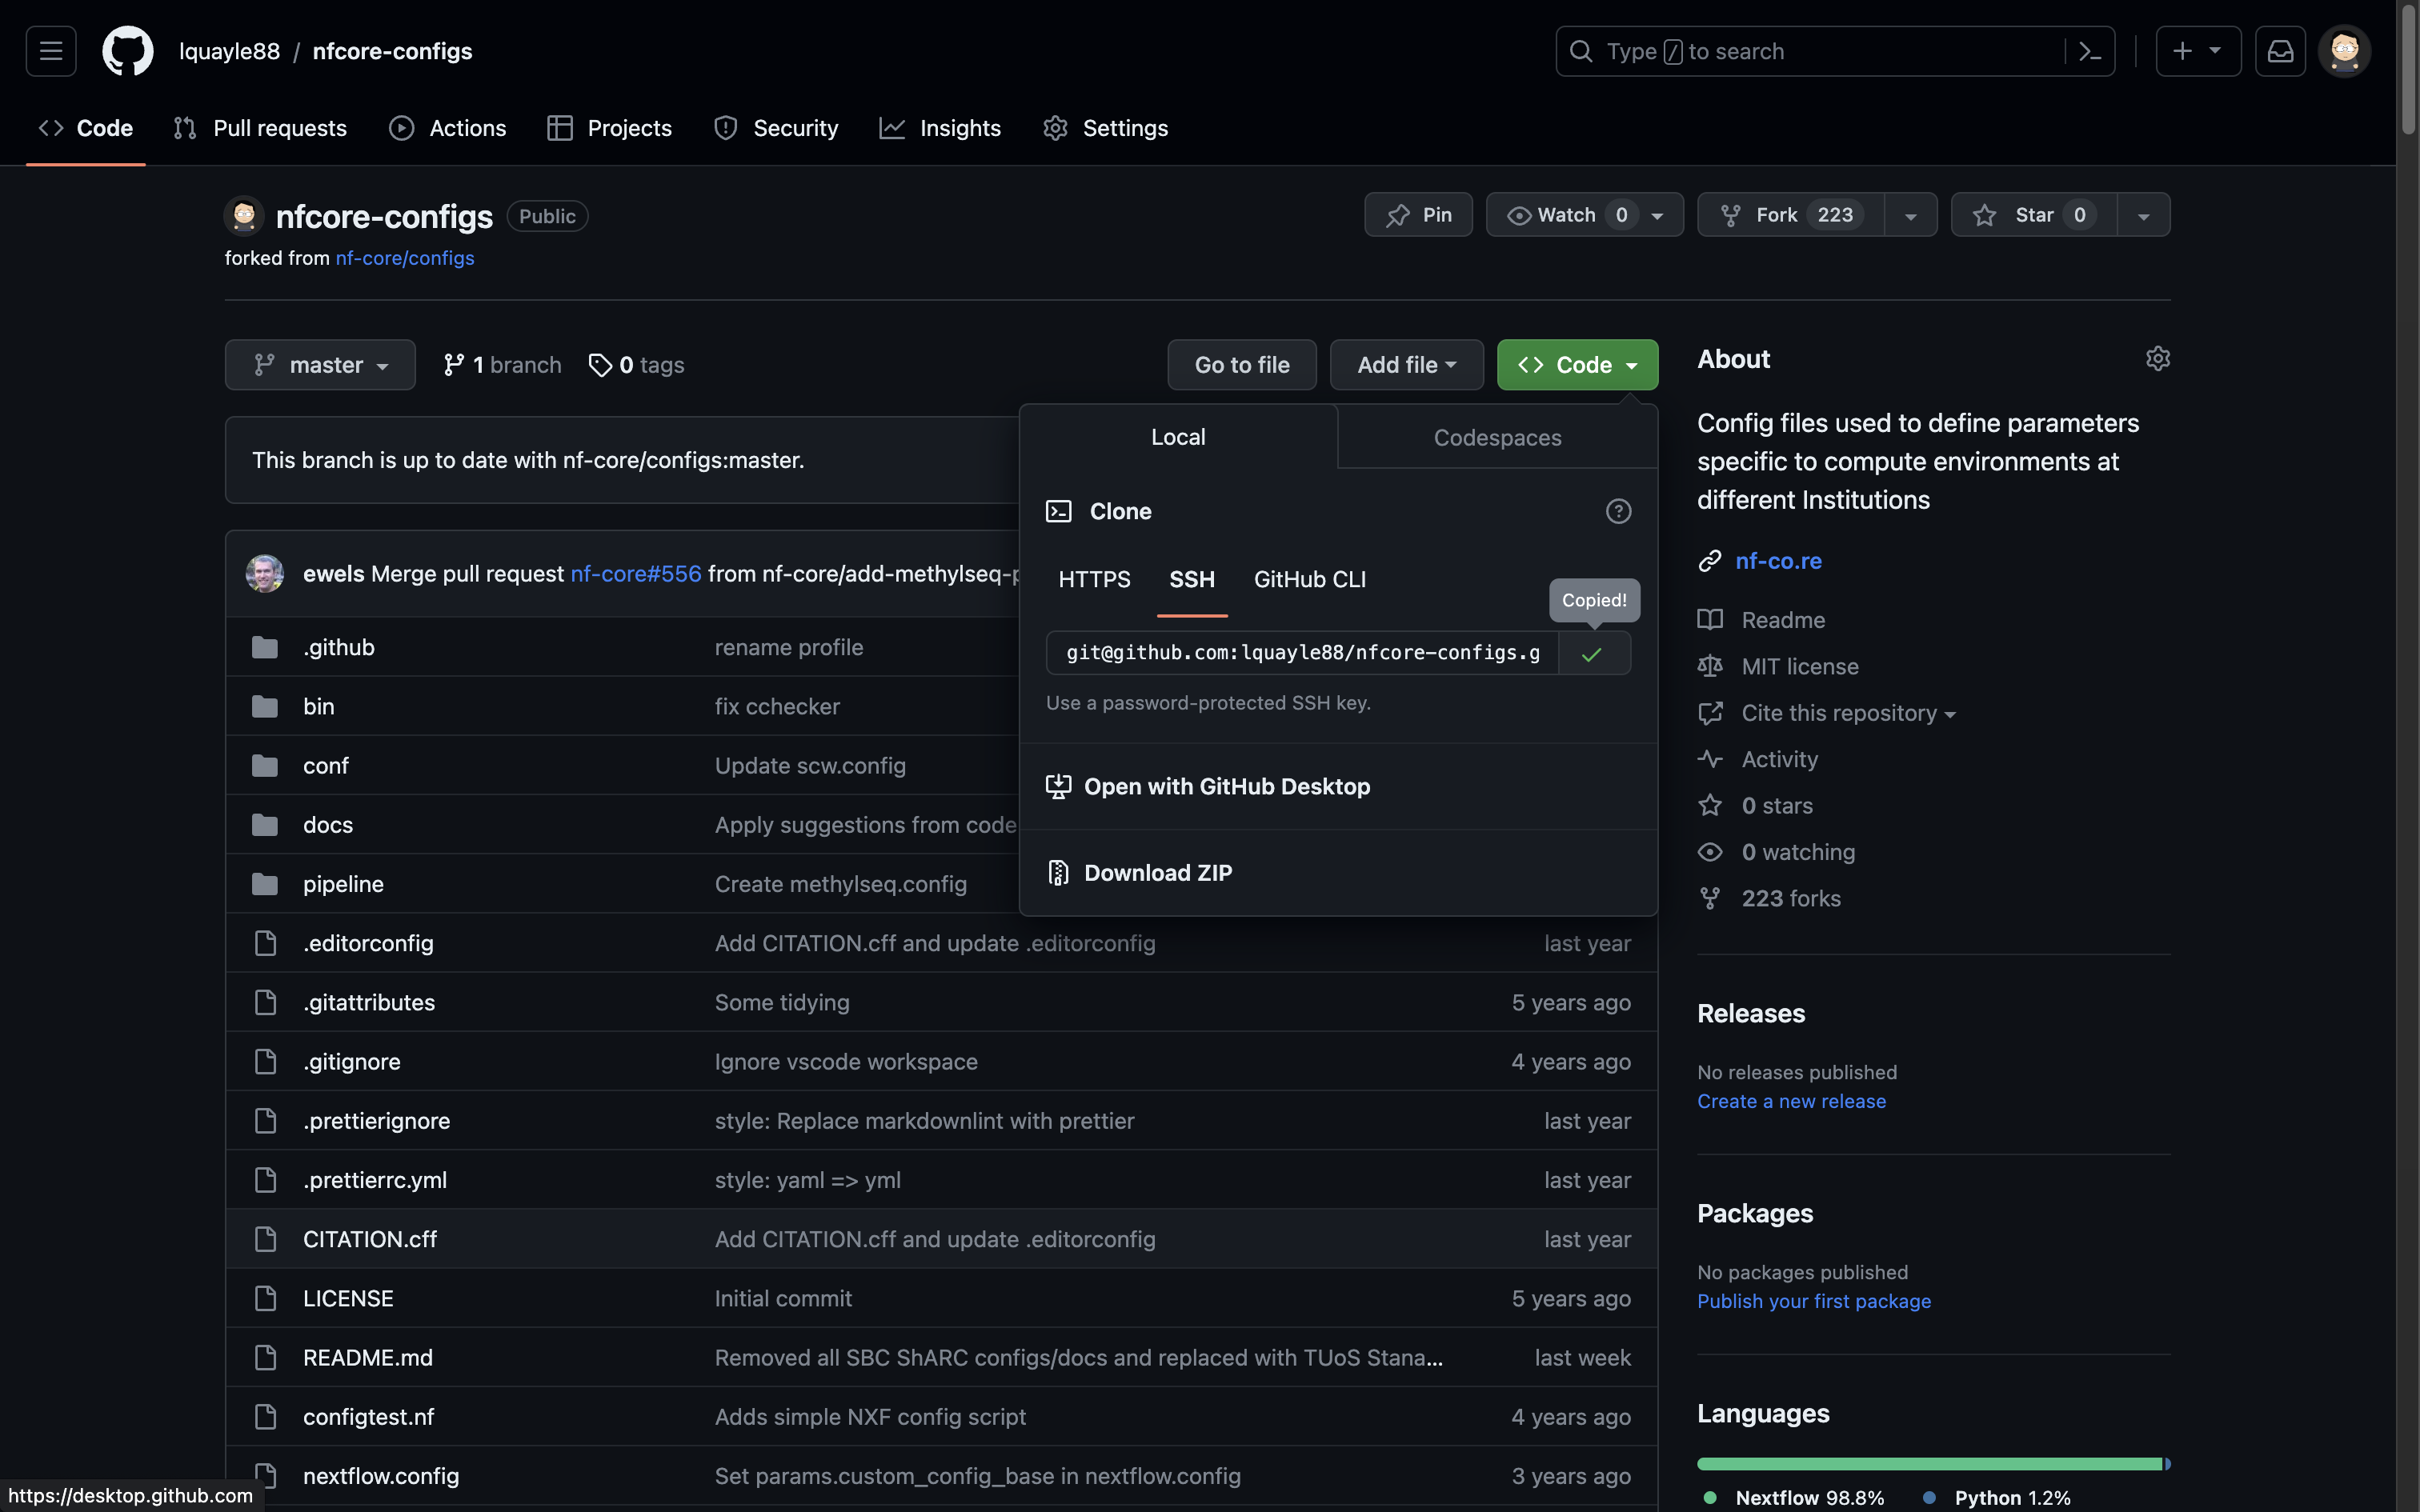 Click to Zoom
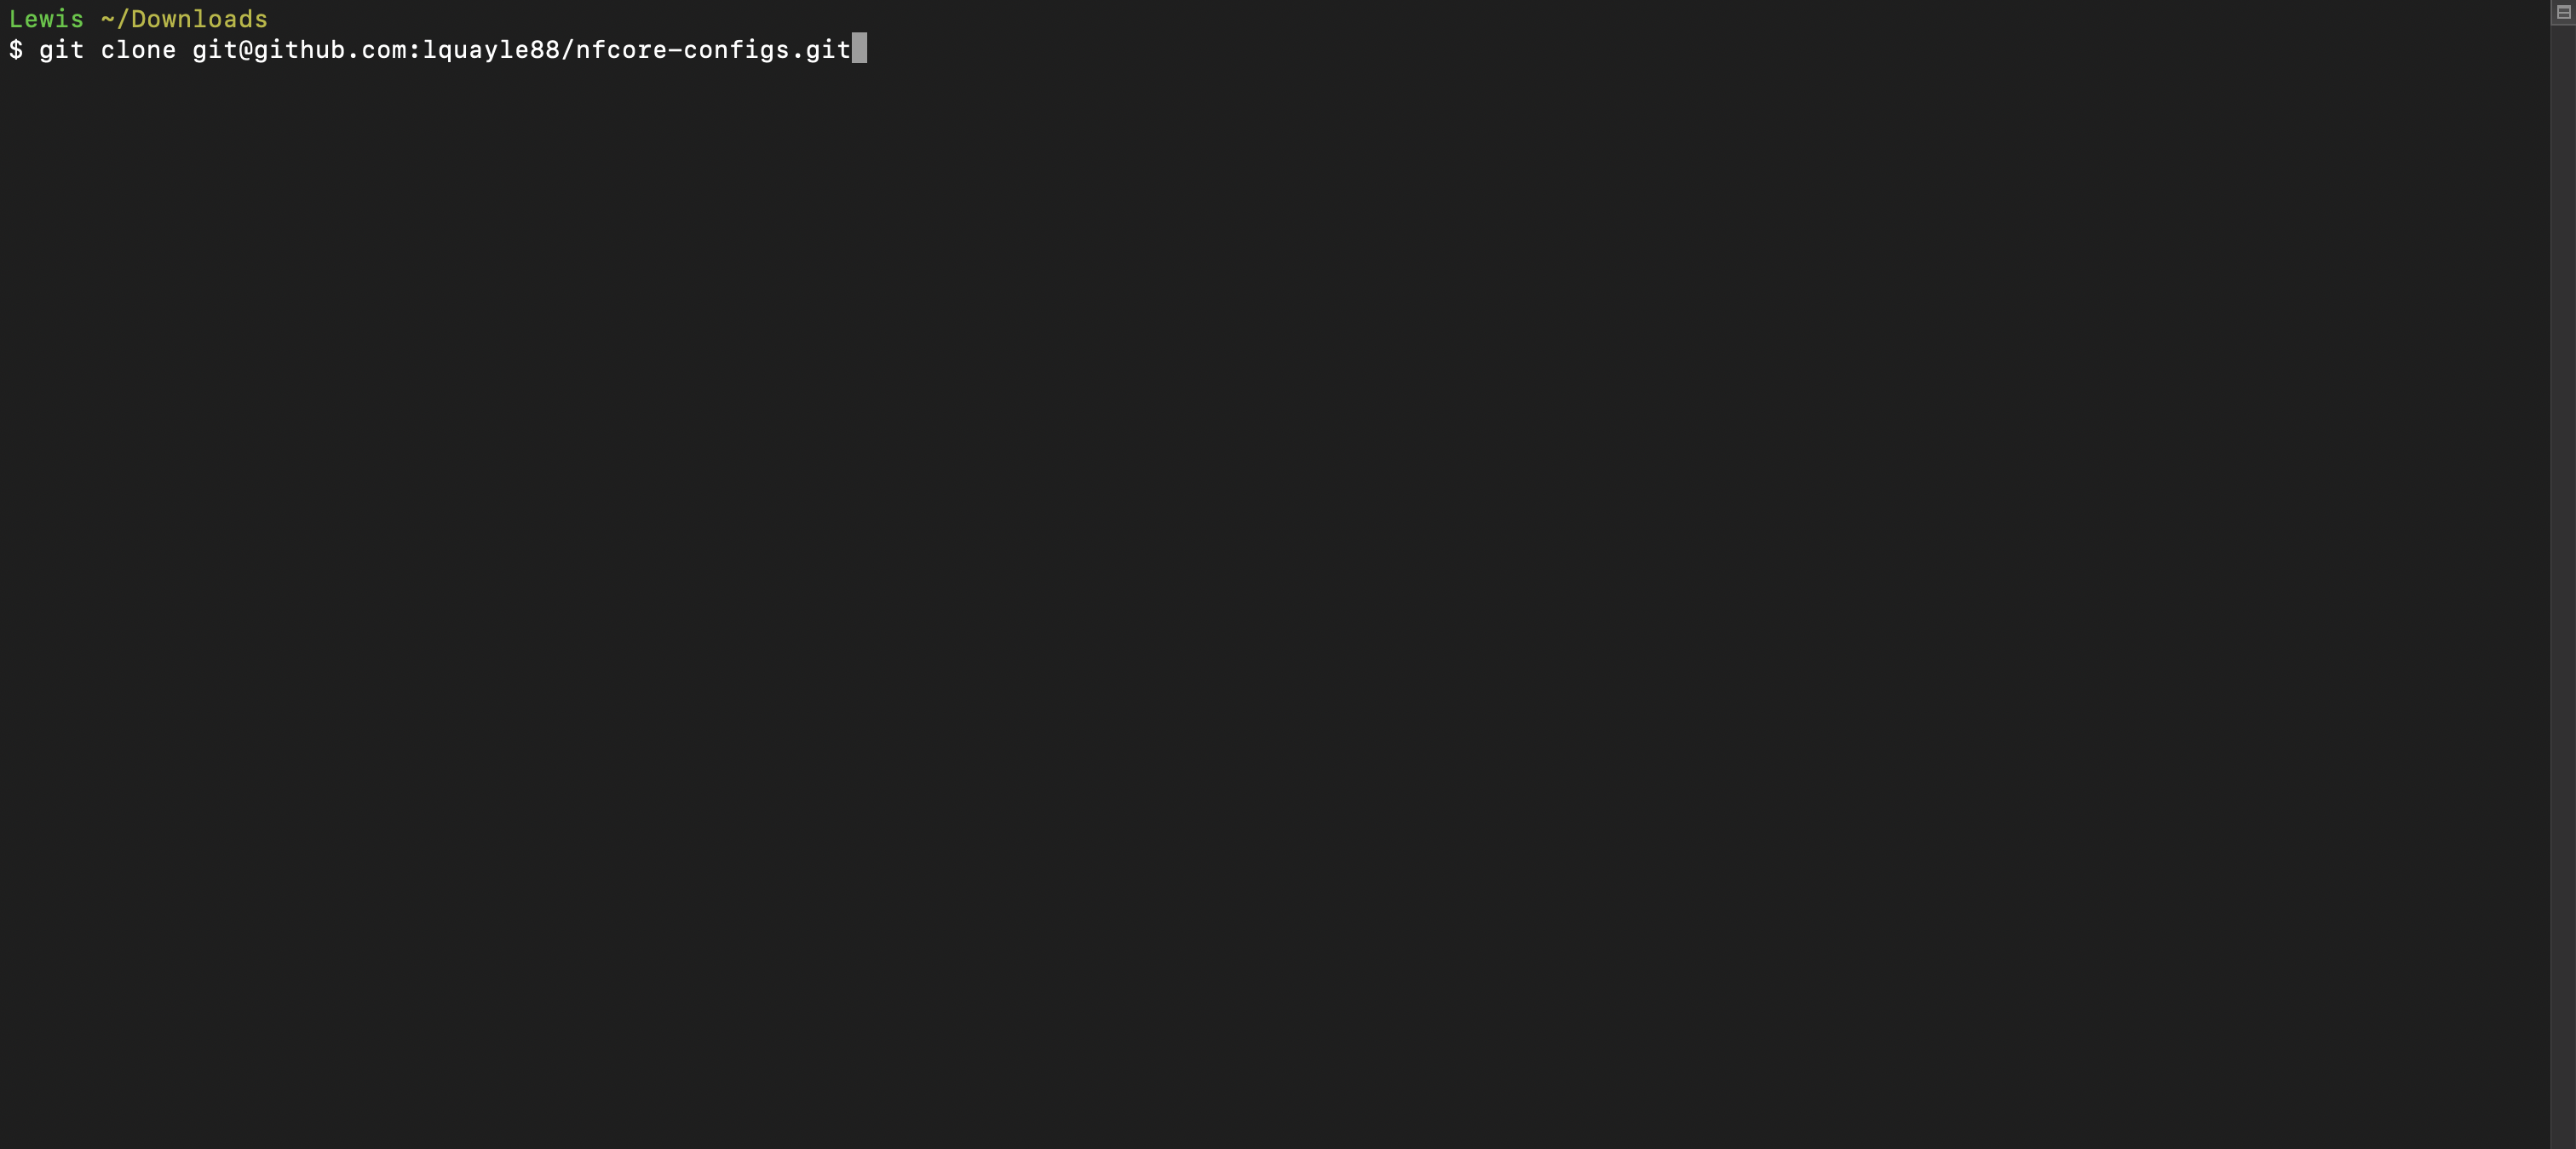
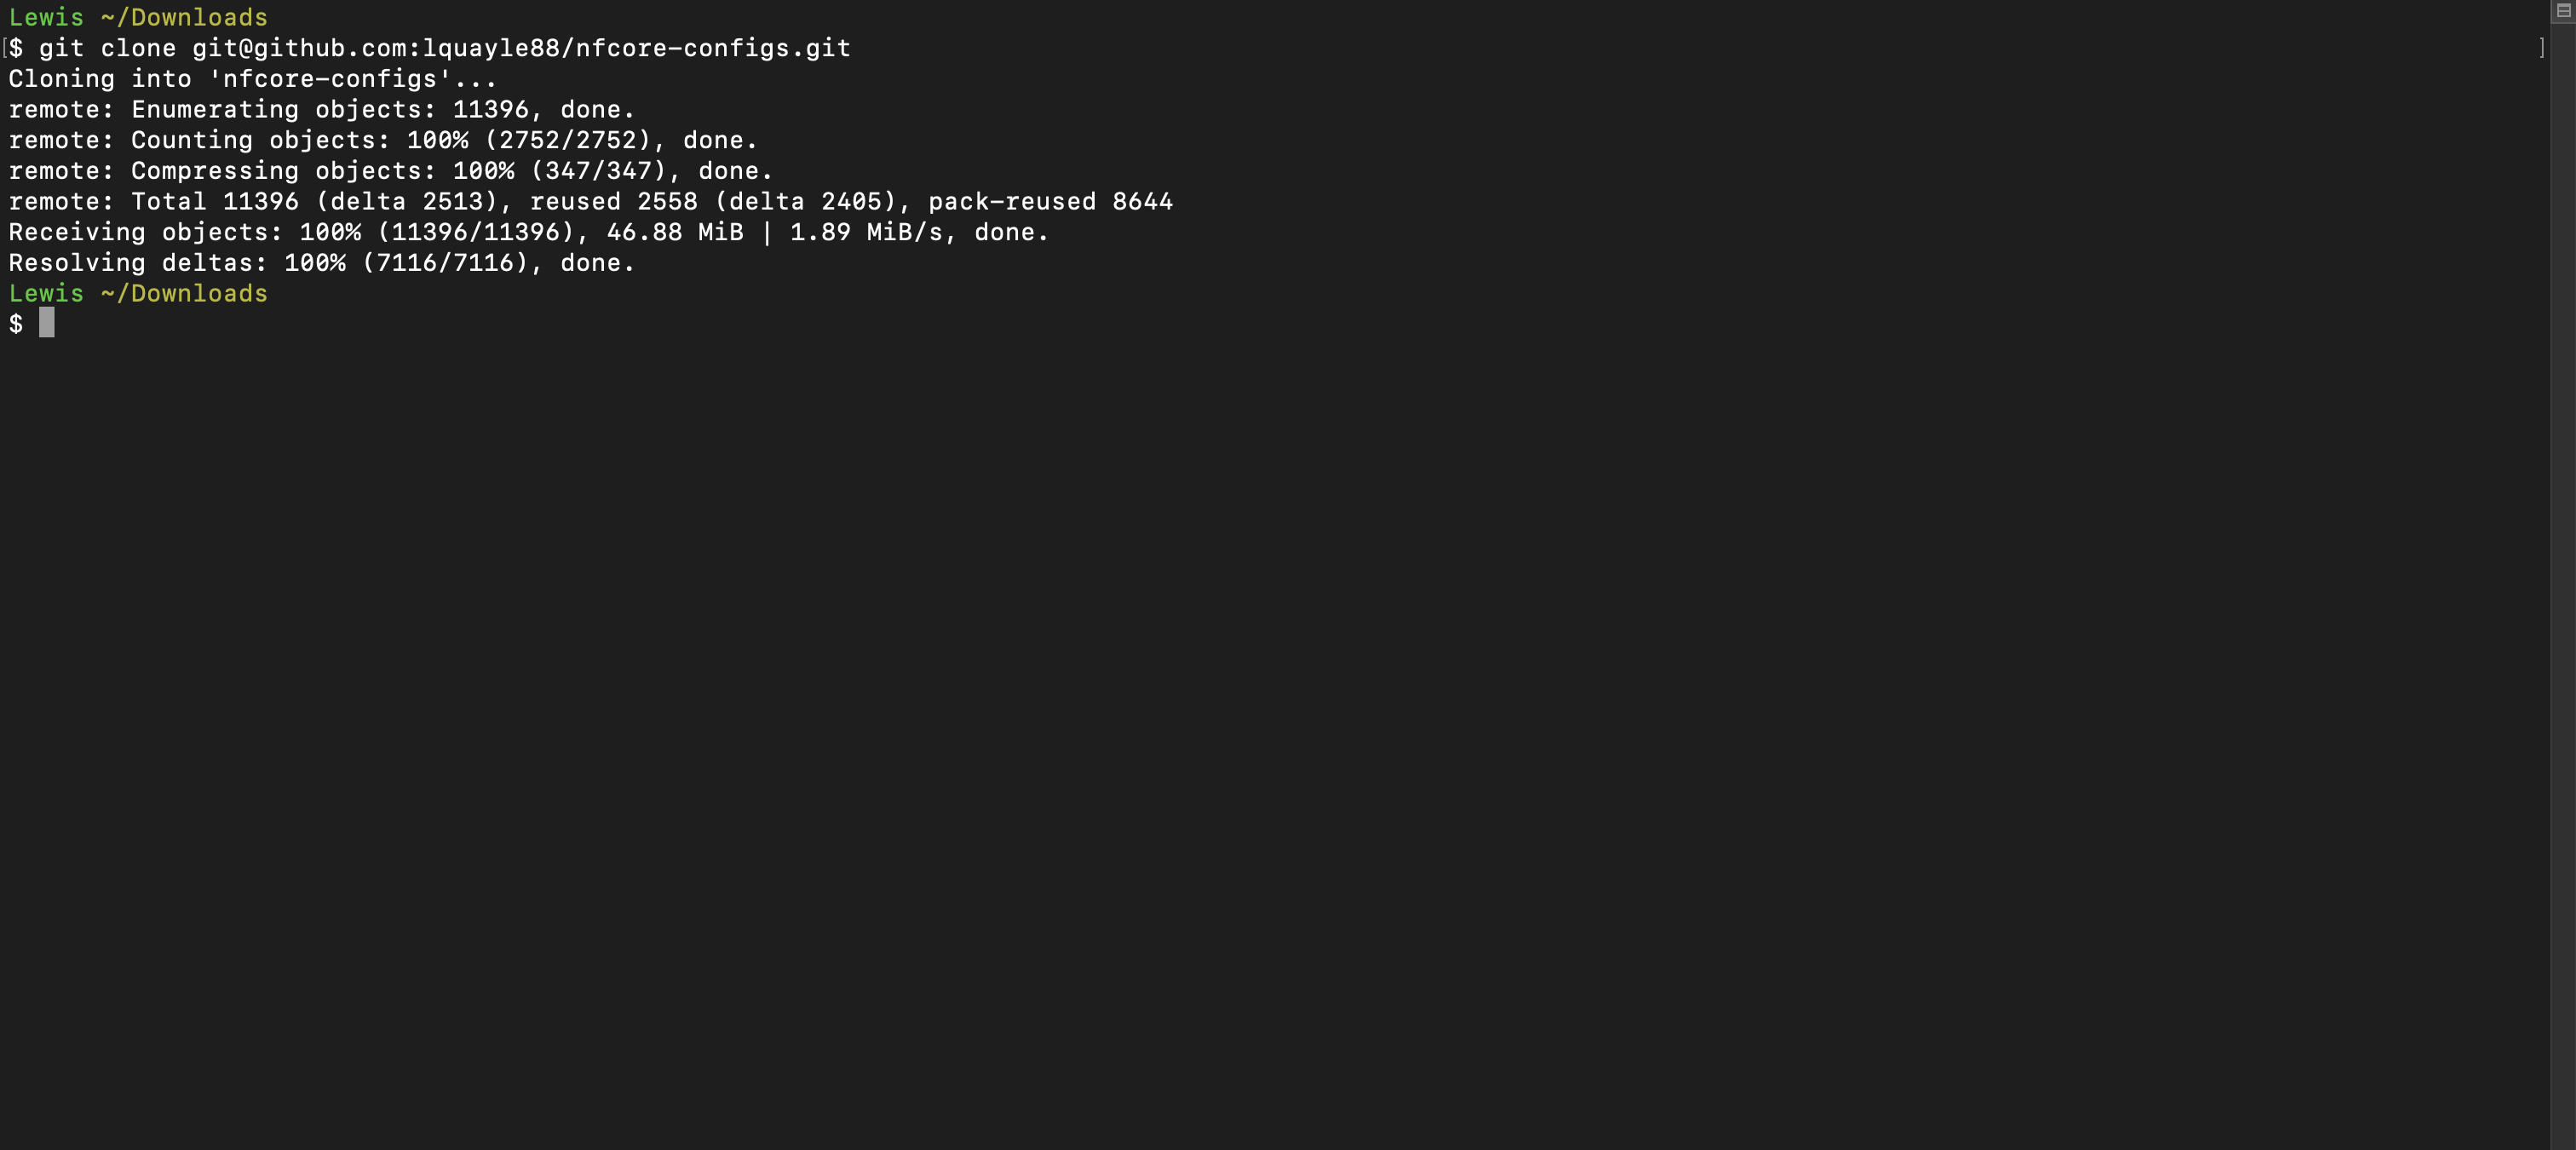
Open your terminal (or Git Bash on Windows), navigate to the directory where you want to store your local copy of the repository and run the following command, replacing repository_url with the URL you copied:
git clone repository_url
 Click to Zoom
 Click to Zoom
Step 3: Create a New Branch
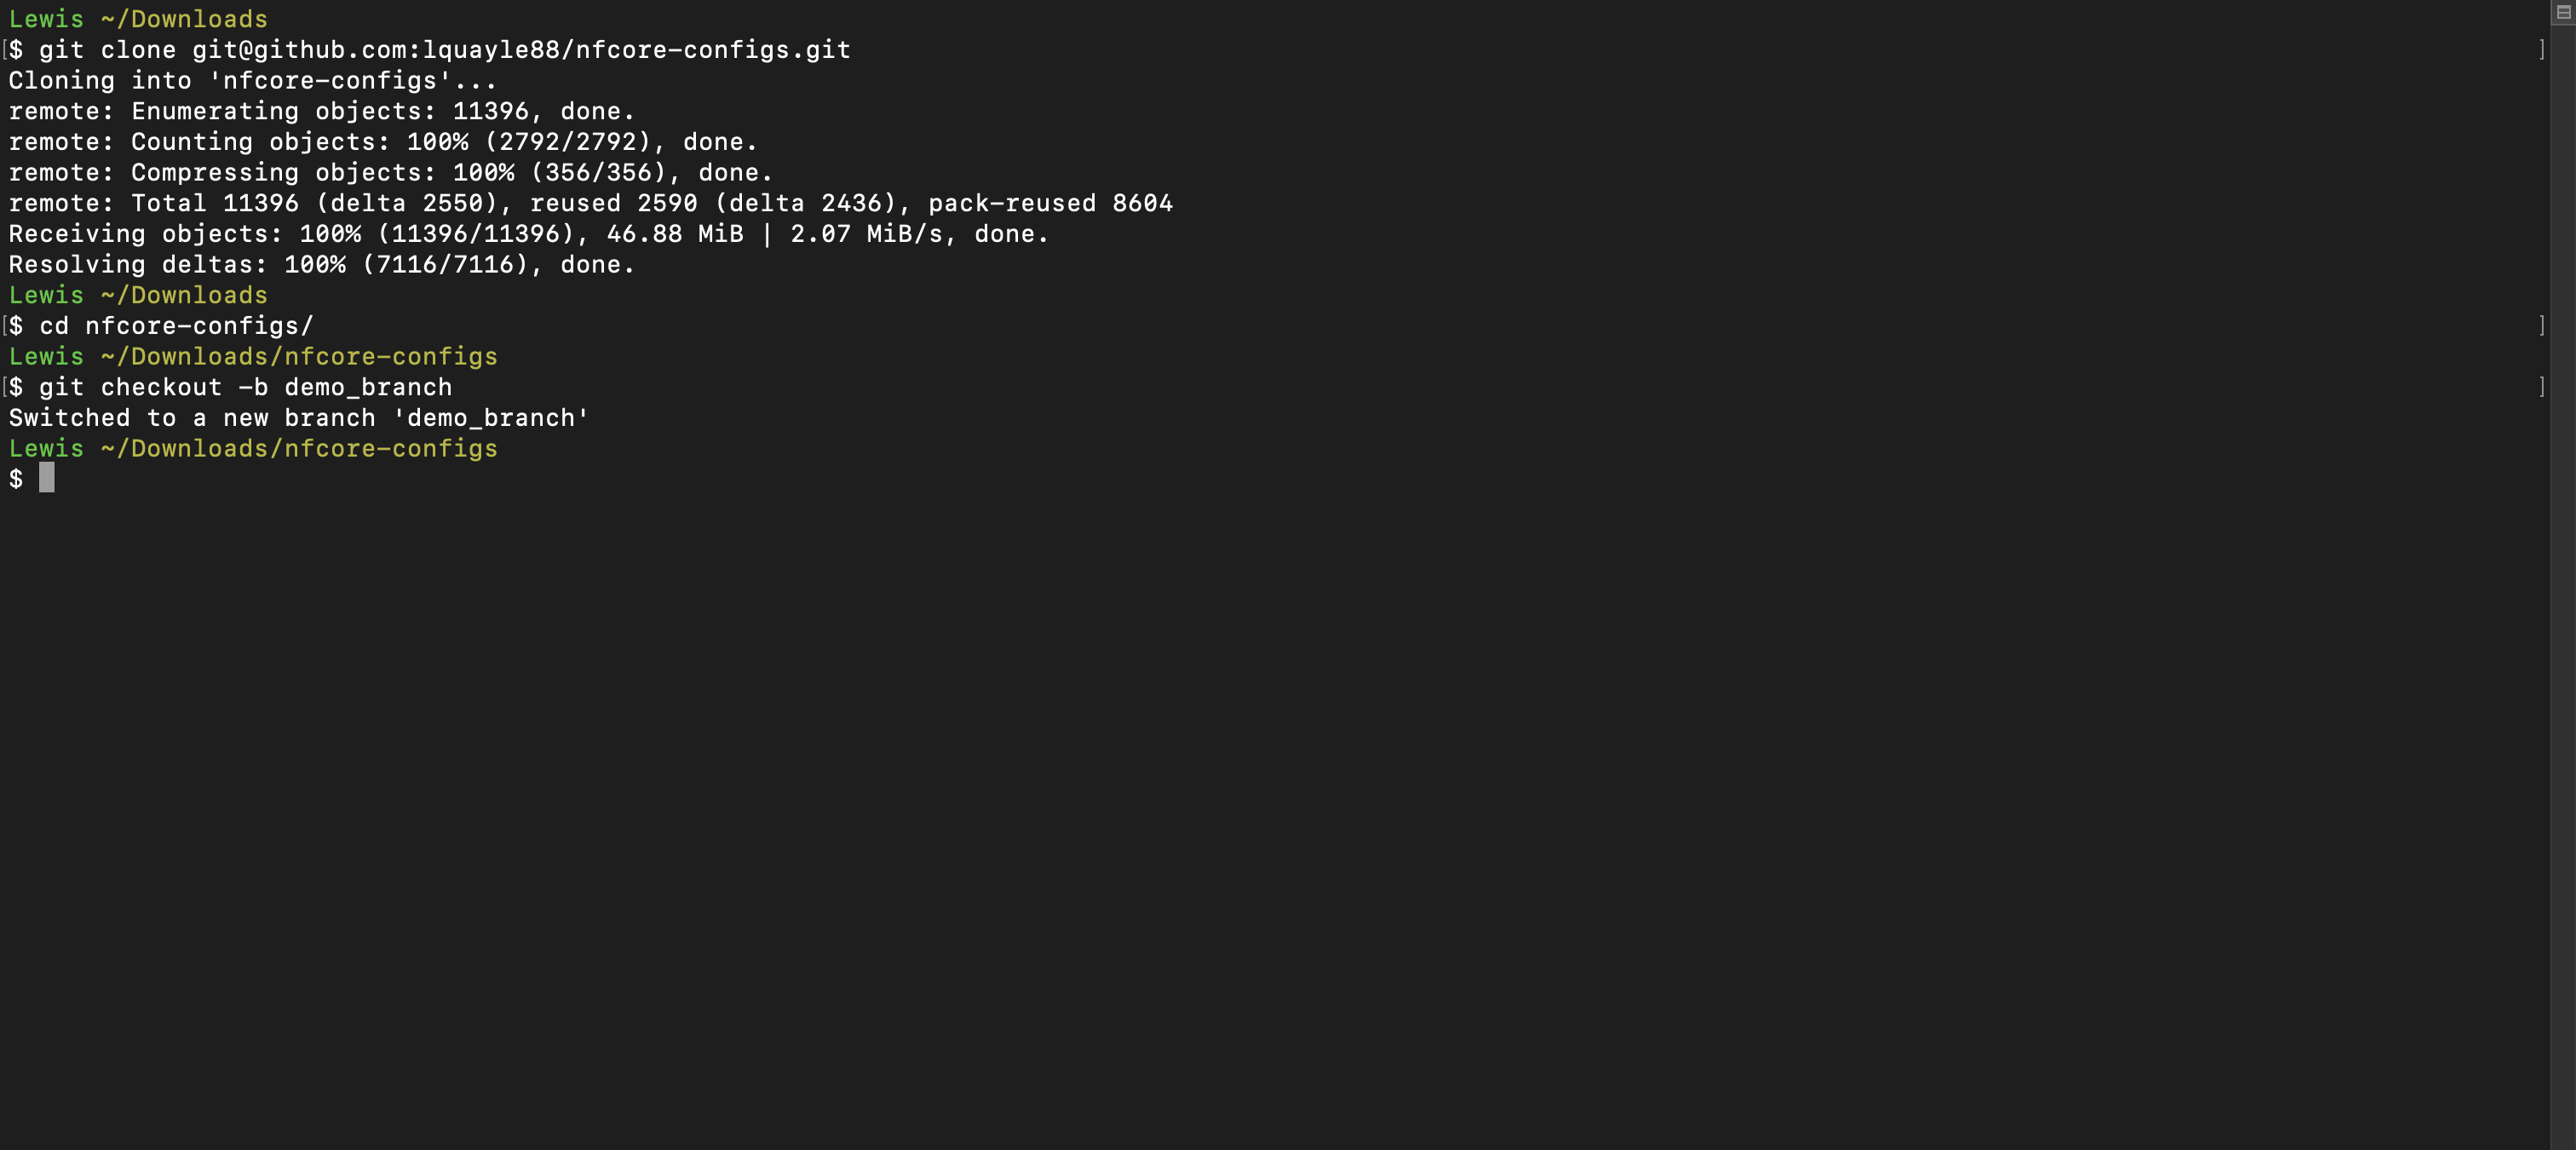
Change into the cloned repository’s directory using cd repository_name and create a new branch for your changes. Be sure to name it descriptively.
git checkout -b branch_name
 Click to Zoom
Step 4: Make Your Changes
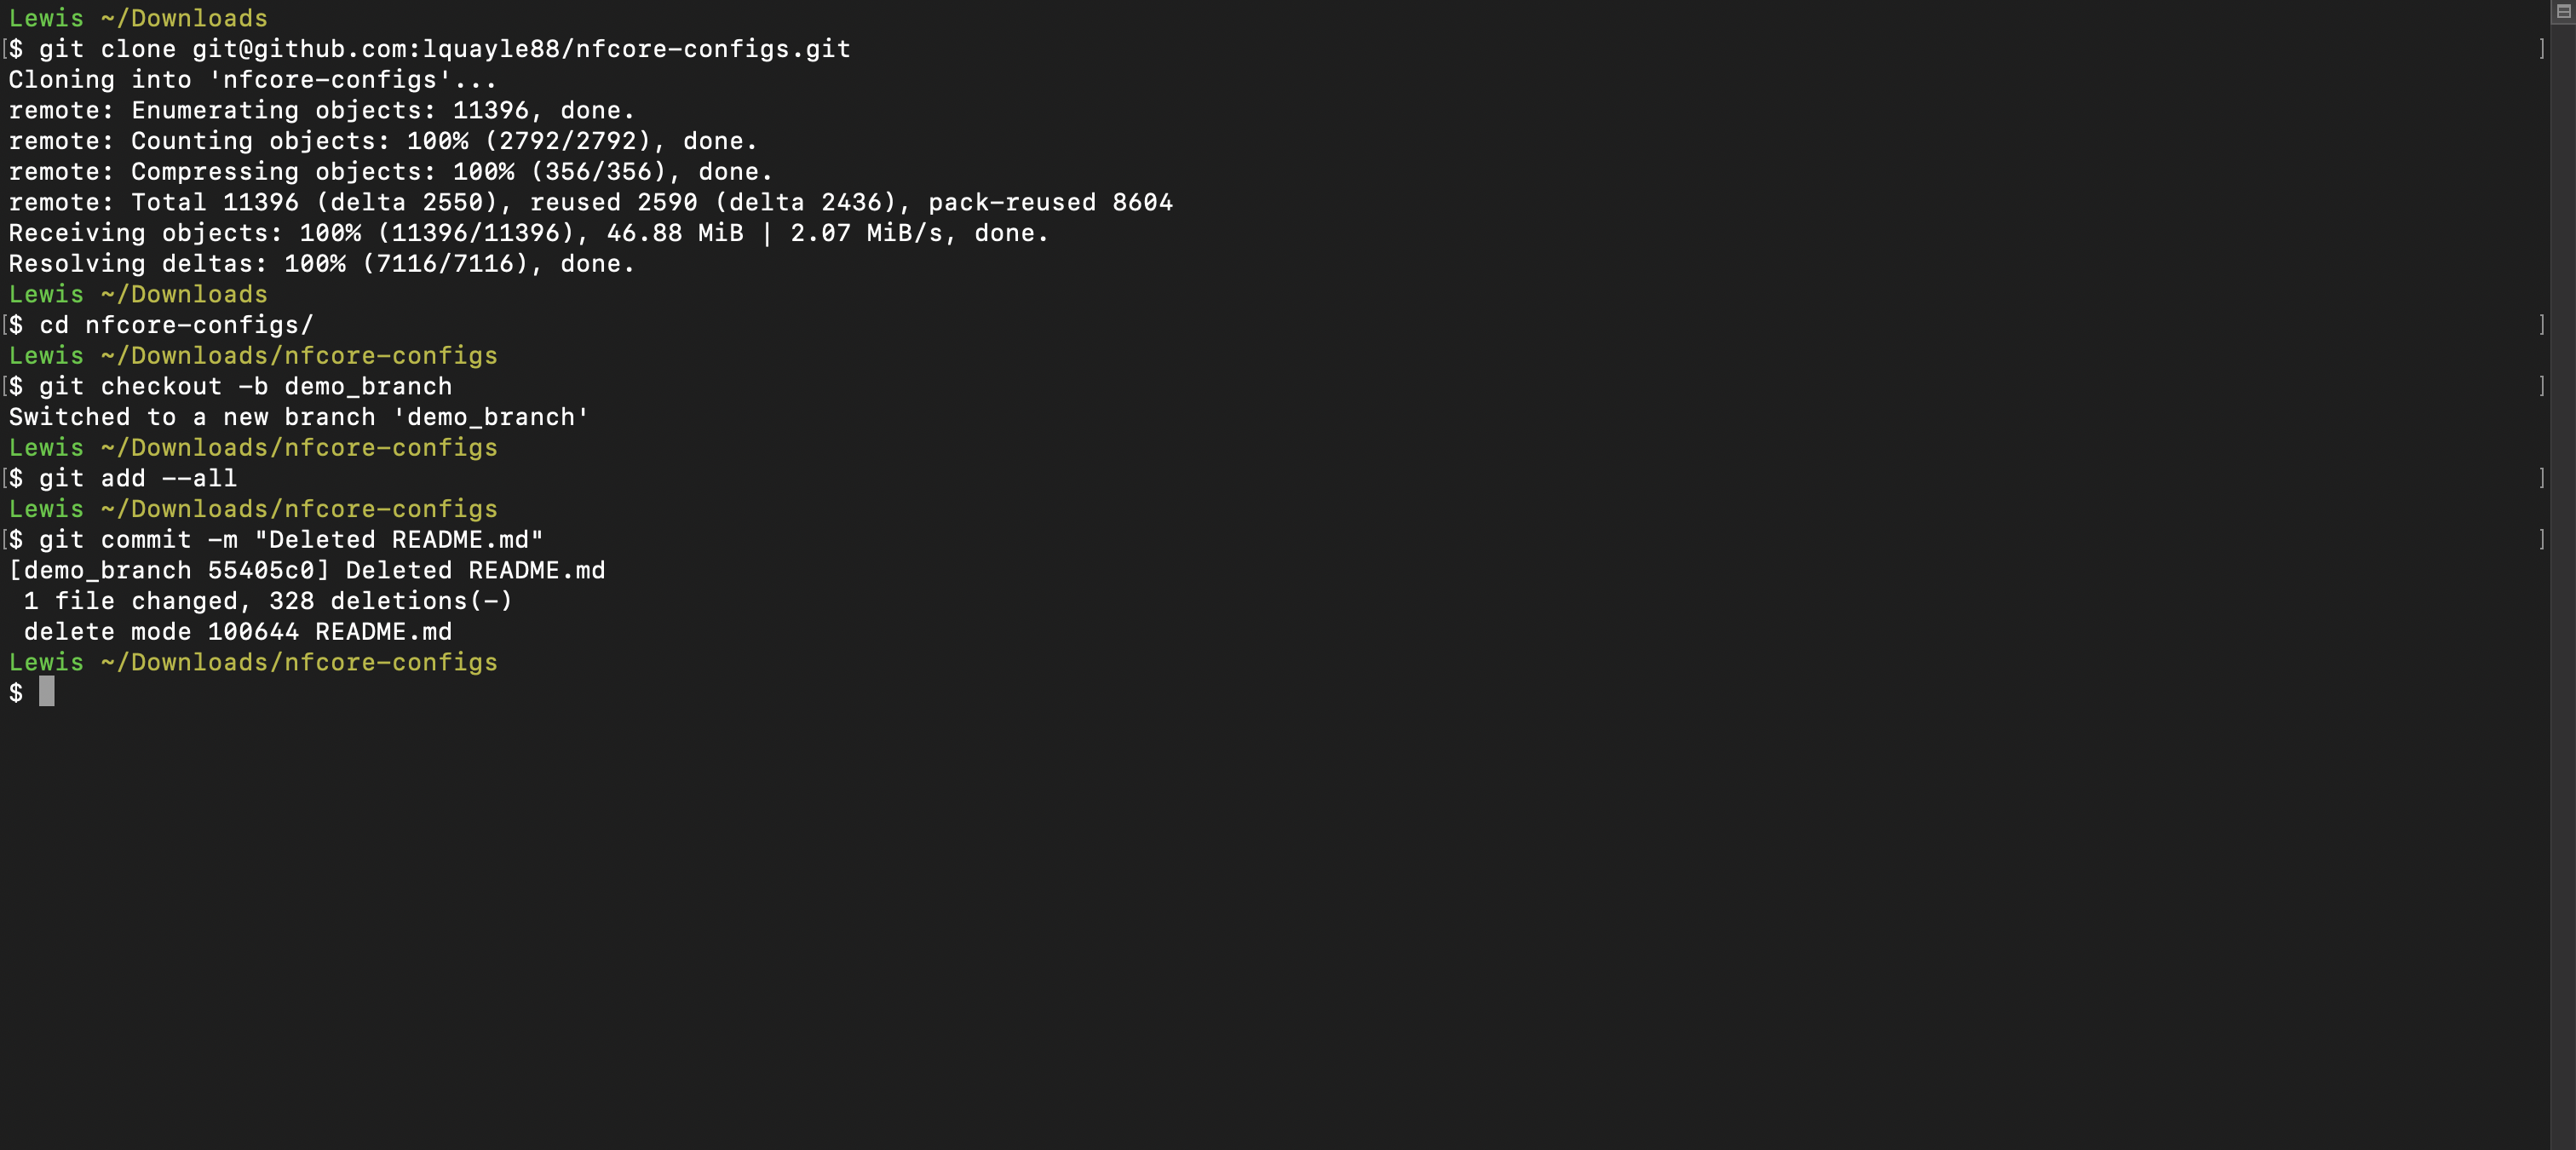
Make the necessary code changes or additions to the files in your local repository. In my case, I simply deleted the README.md already present in the repo so that I had some changes that would enable me to demonstrate the next steps.

Step 5: Commit Your Changes
After making your changes, stage them for commit and commit the changes with a descriptive commit message.
# stage changes to all modified files
git add --all

# commit changes with a descriptive message
git commit -m "Description of changes"
 Click to Zoom
Step 6: Push Changes to Your Fork
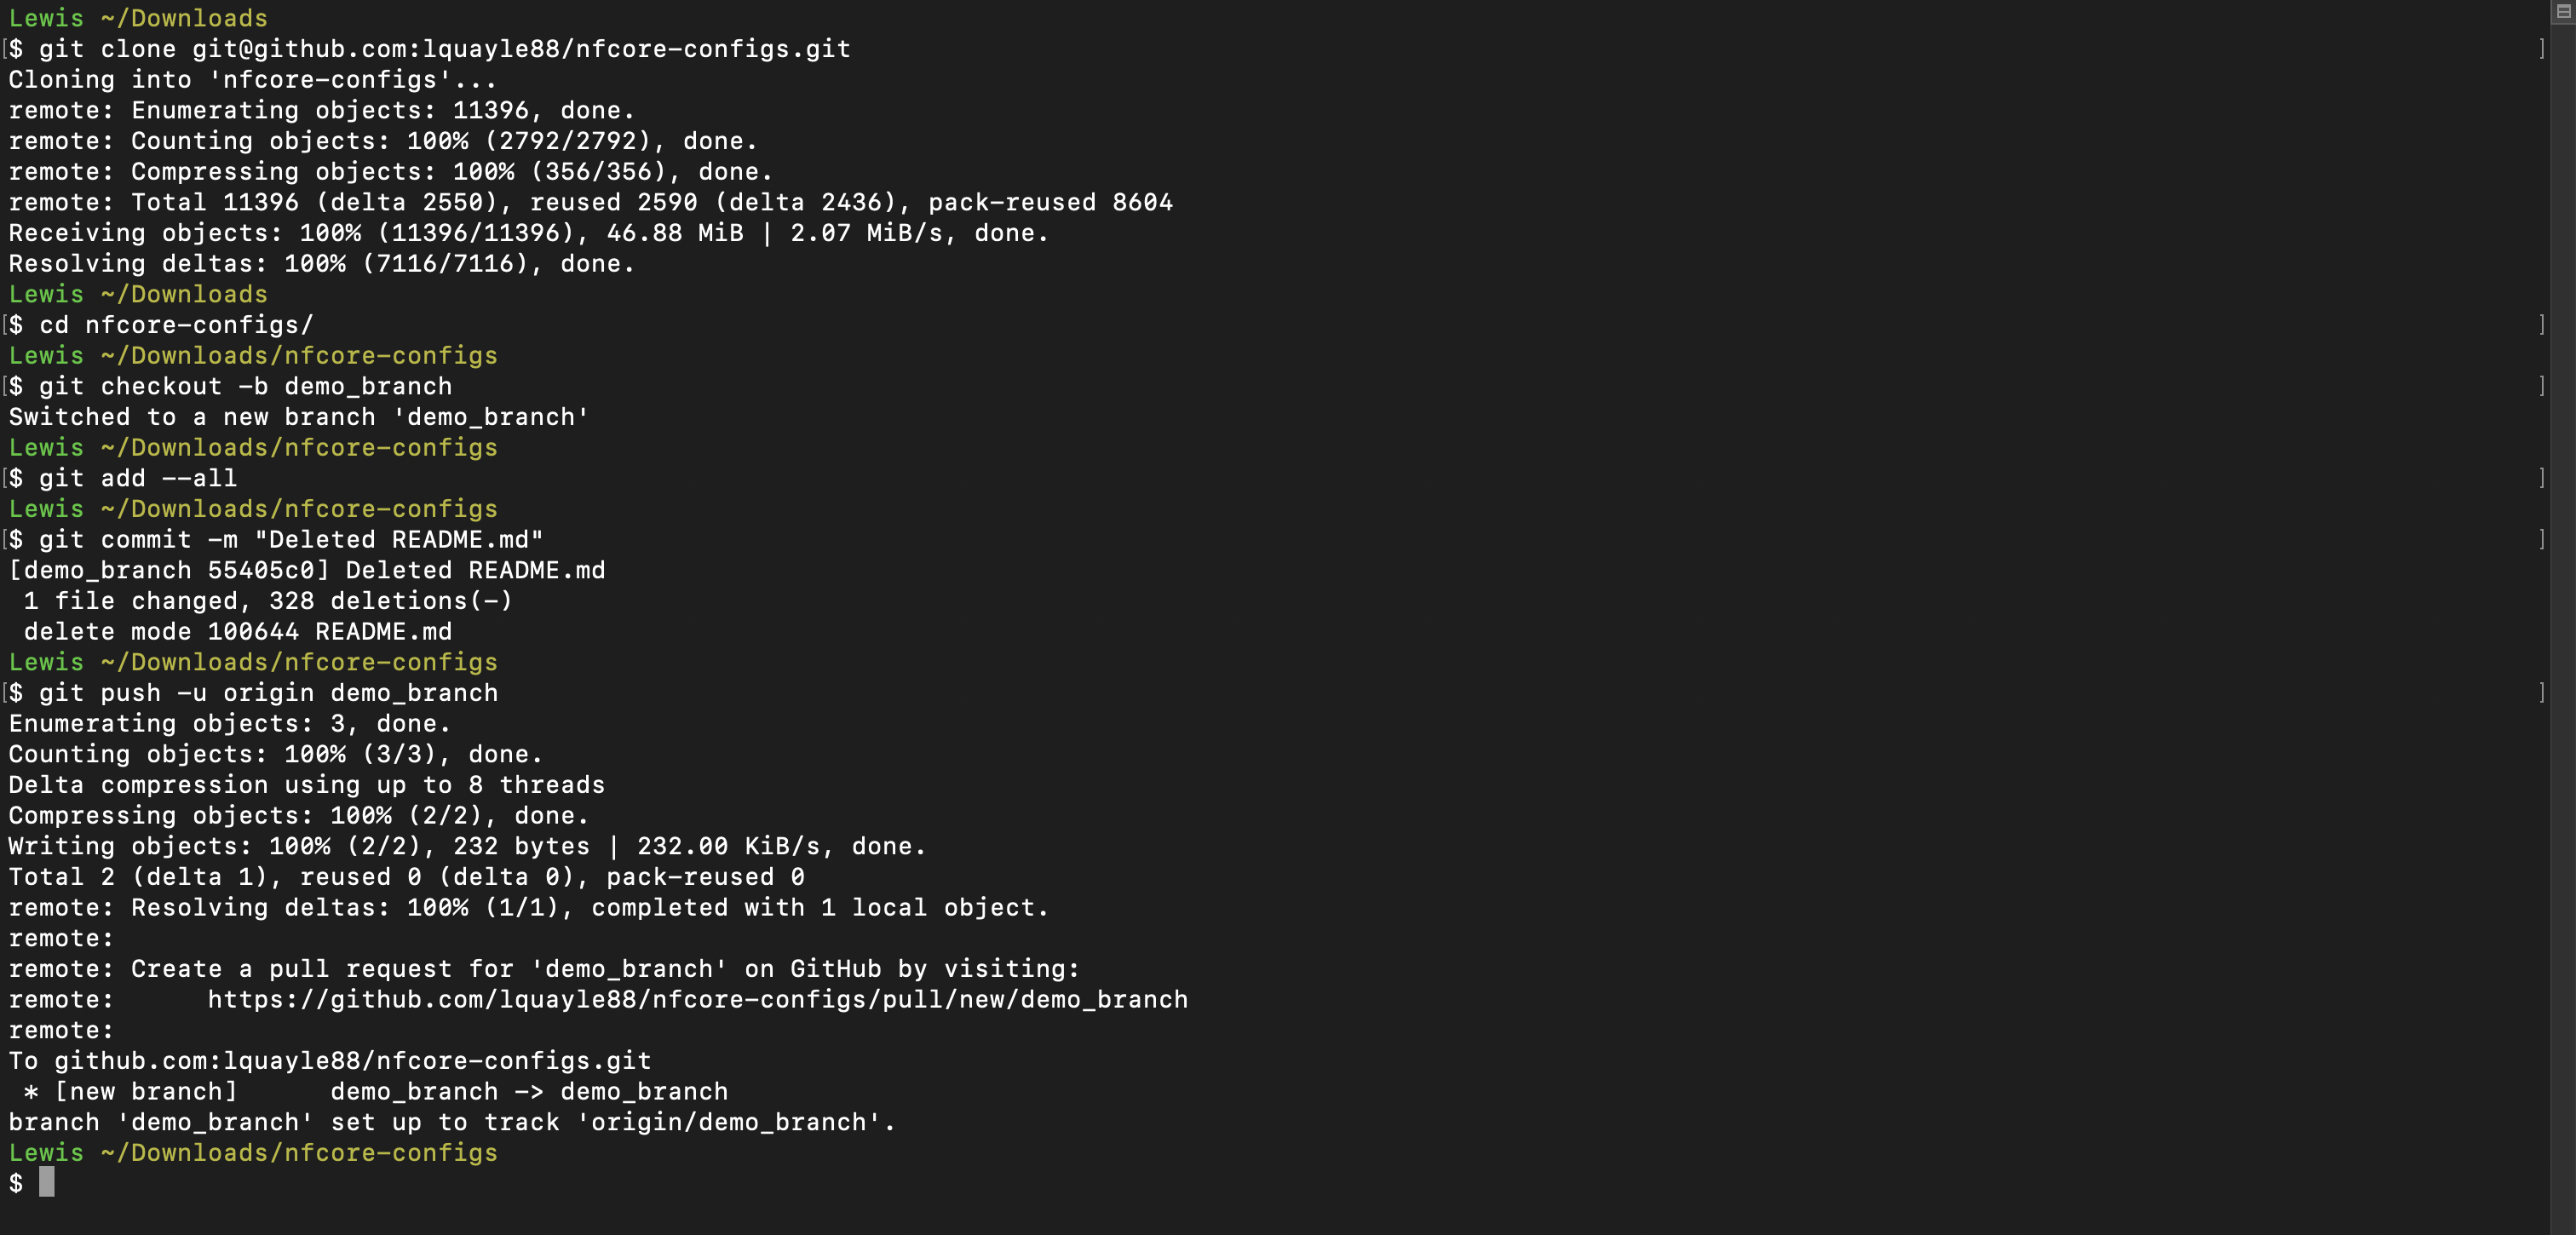
Push your local changes to your forked repository on GitHub:
git push -u origin branch_name
 Click to Zoom
Step 7: Create a Pull Request
Go to your forked repository on GitHub and you should now see a green “Compare & pull request” button; click it.
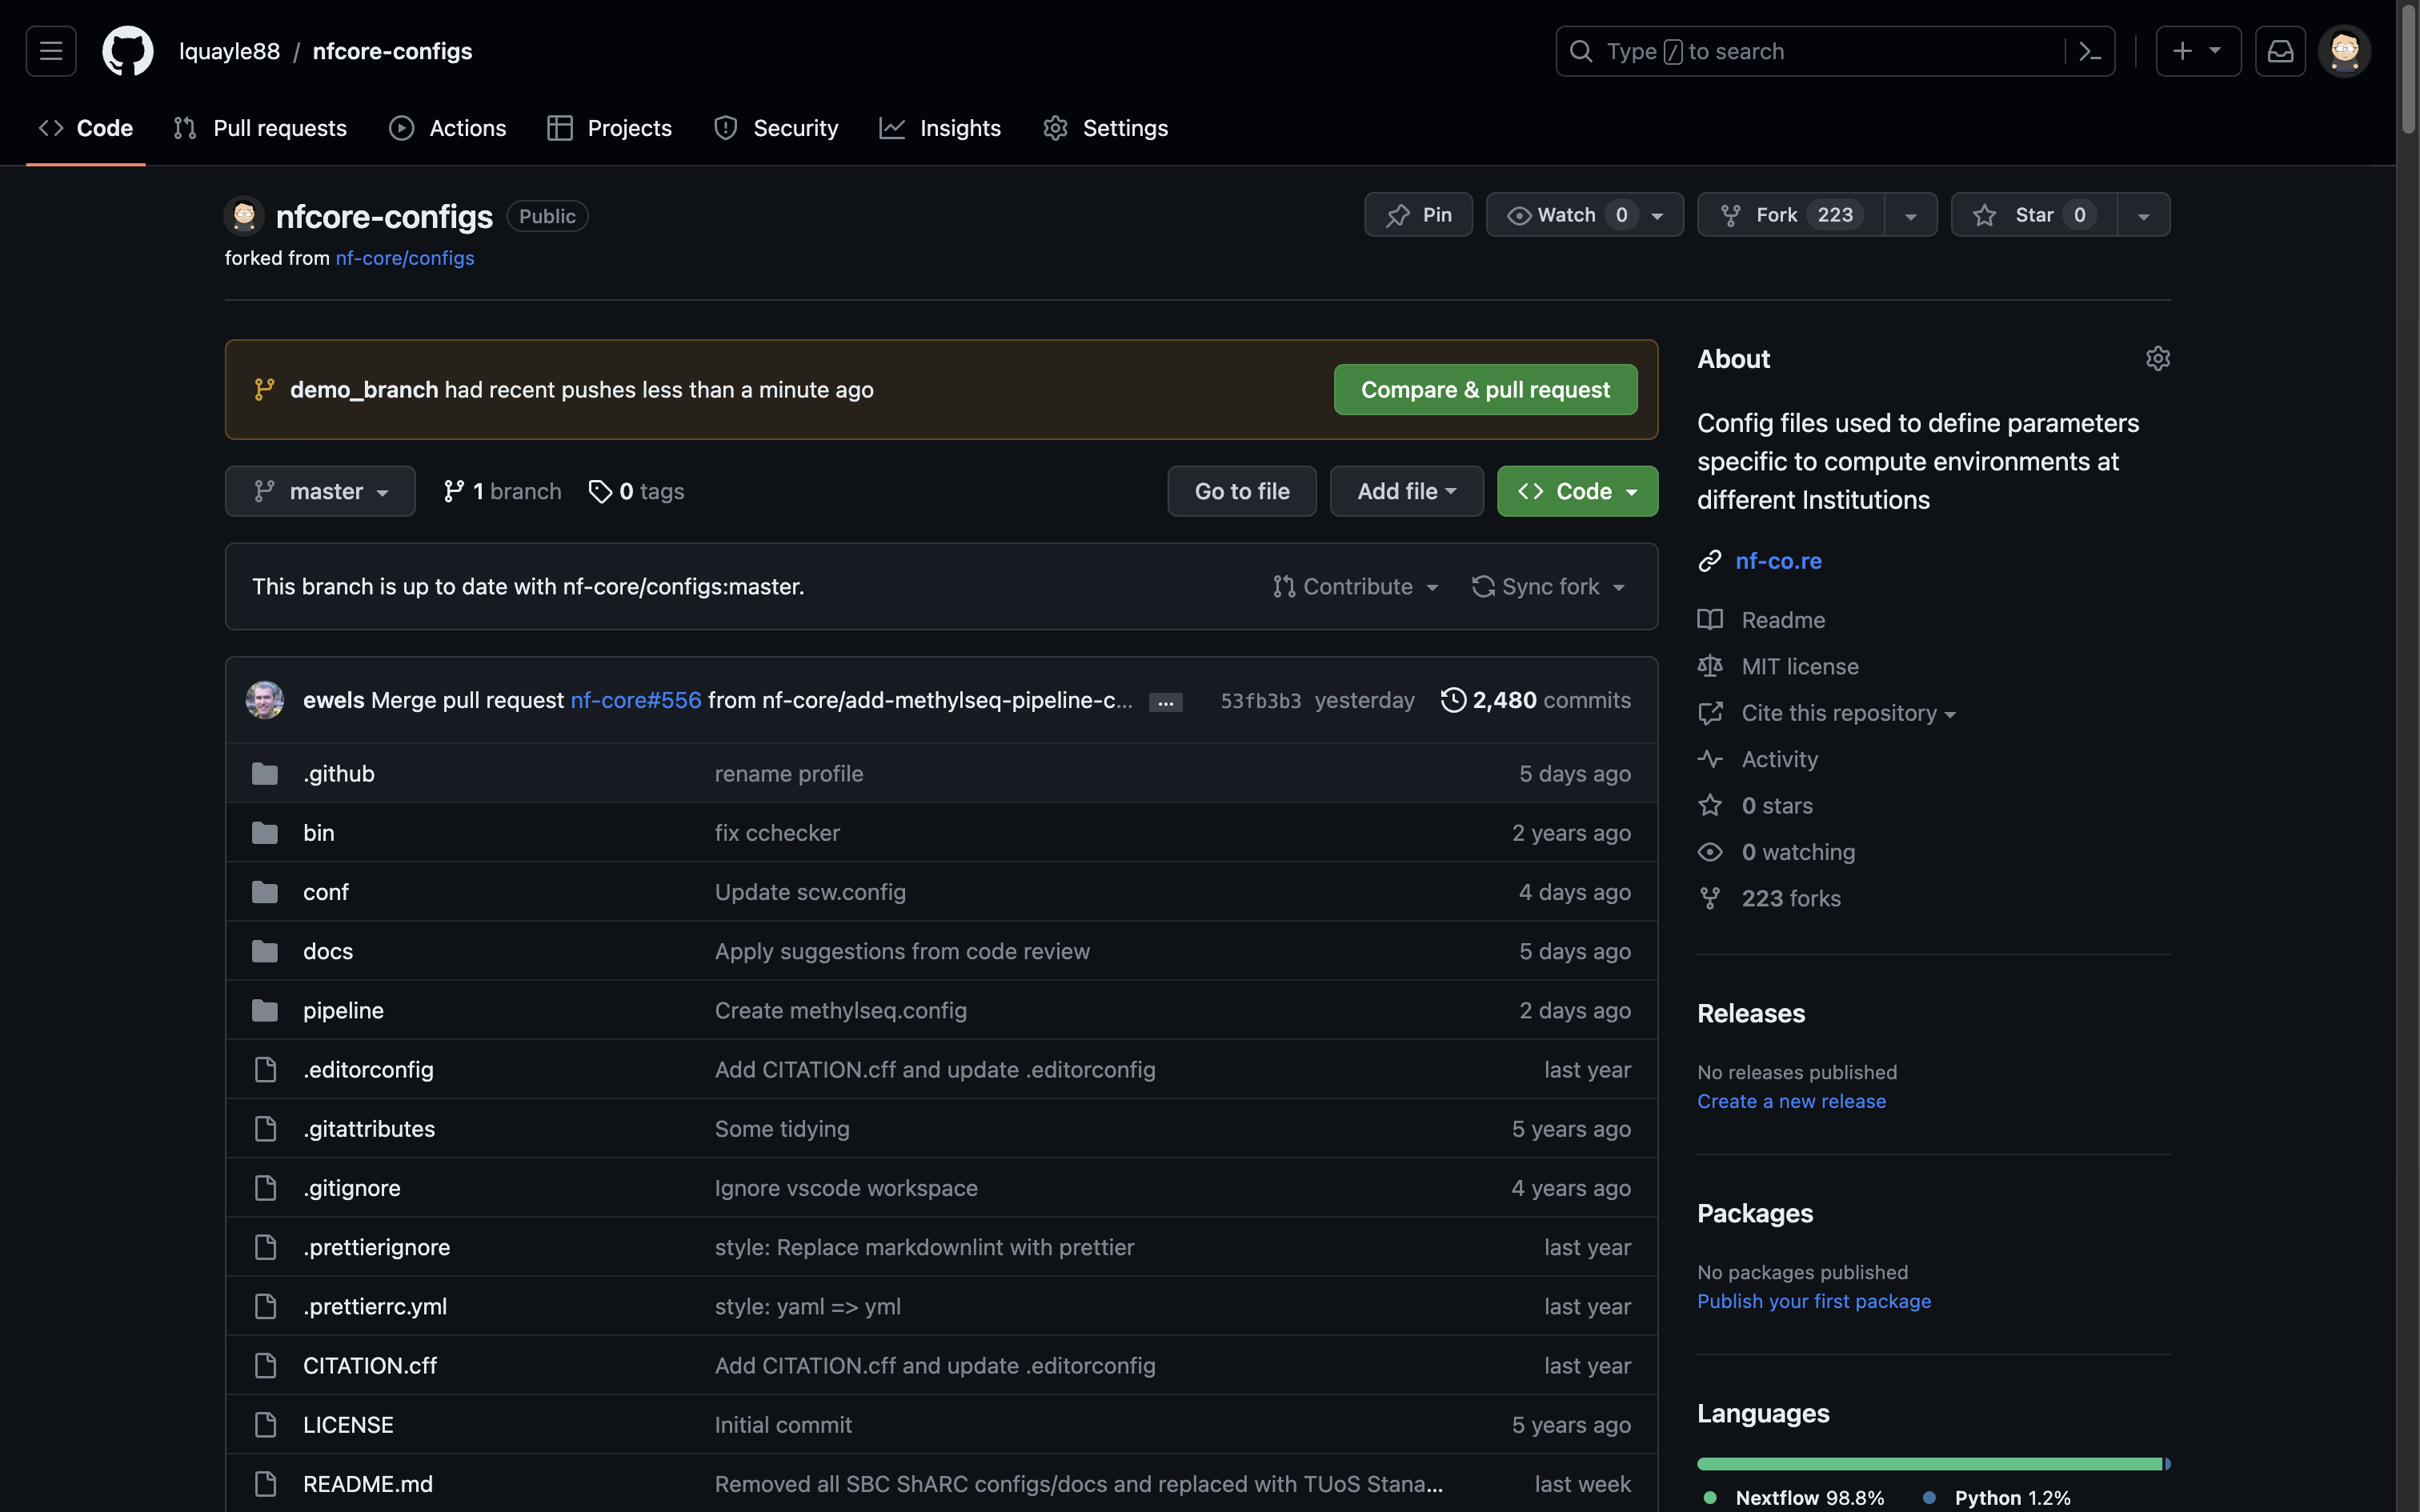 Click to Zoom
You’ll be taken to the original repository’s page. Ensure the base repository (the one you want to merge your changes into) and the base branch (usually “main” or “master”) are correct. Add a title and a detailed description for your pull request, explaining the changes you made. Review your changes in the “Files changed” tab. Once you’re happy, click the “Create pull request” button.
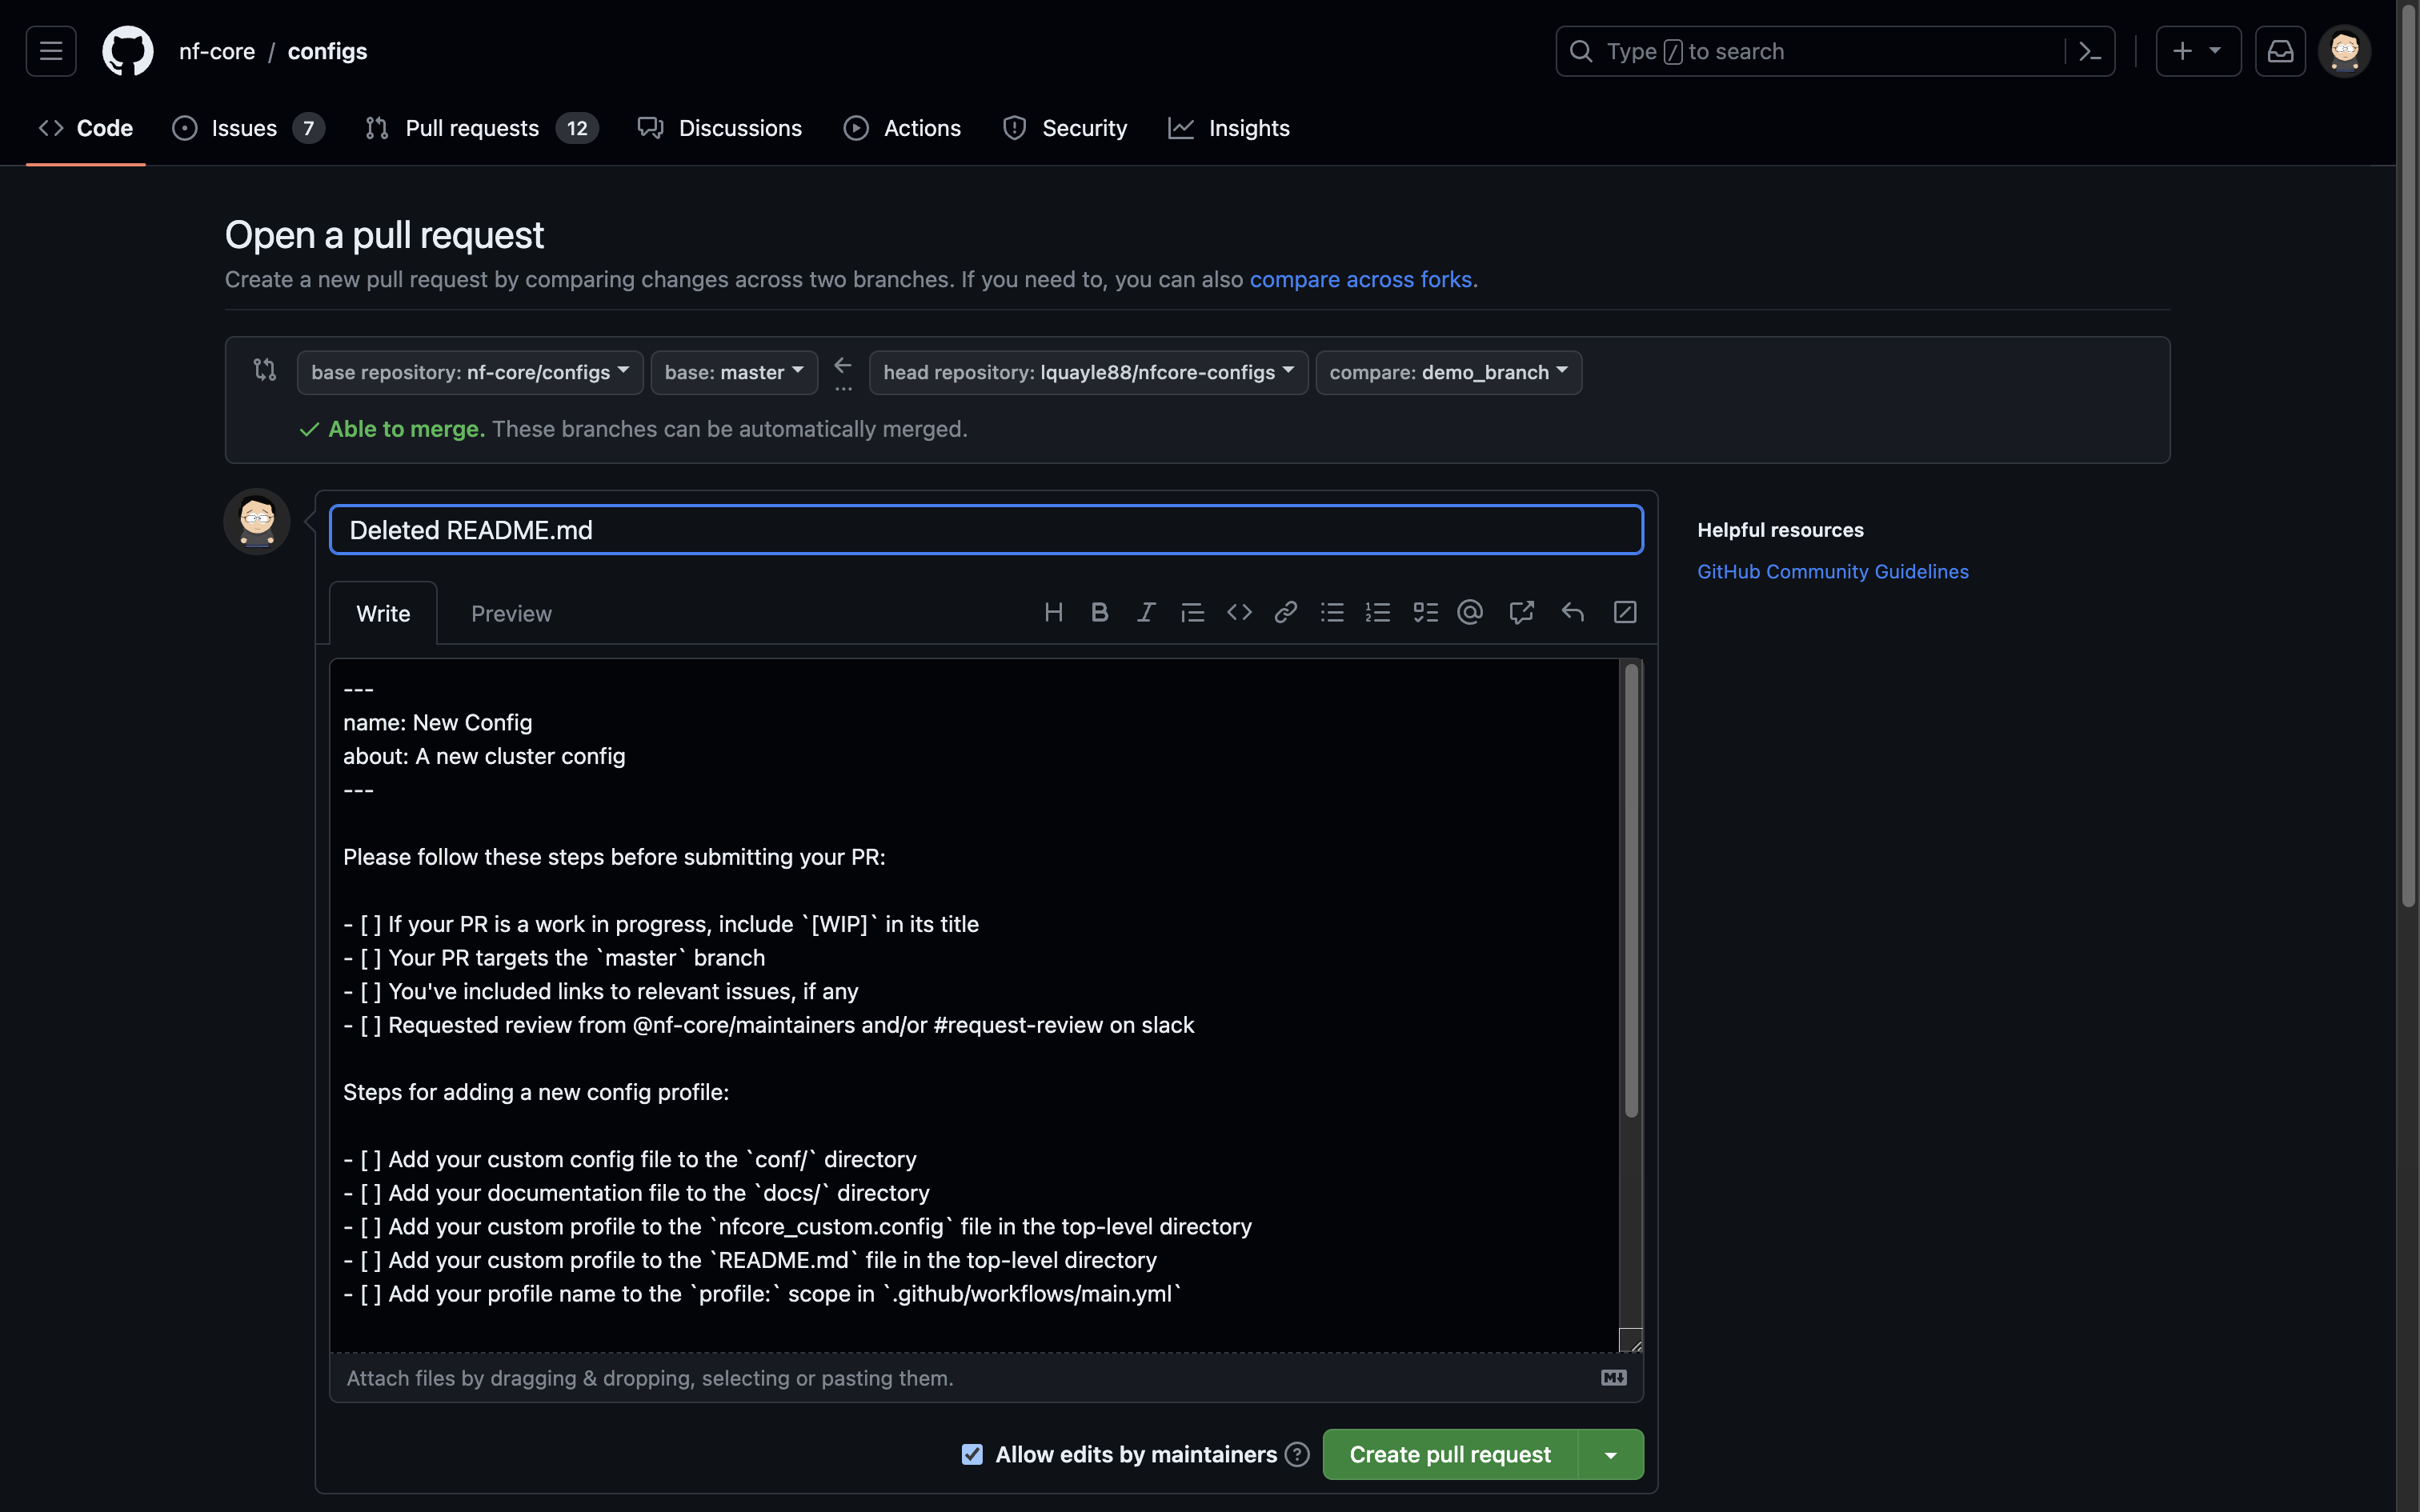 Click to Zoom
Step 8: Wait for Review
Your pull request is now submitted. Contributors to the original repository can review your changes, comment, and request modifications if needed.
Step 9: Merge Your Pull Request (Optional)
If the maintainers of the original repository are satisfied with your changes, they can merge your pull request. Once merged, your changes will become part of the original repository.
git --review
Congratulations! You’ve successfully created a pull request on GitHub.
Remember to be patient during the review process and be ready to make further changes based on feedback from the repository maintainers.
Now go get that pull shark badge! 🚀
Thanks for reading. I hope you enjoyed the article and that it helps you to get a job done more quickly or inspires you to further your data science journey. Please do let me know if there’s anything you want me to cover in future posts.
Happy Data Analysis!
Disclaimer: All views expressed on this site are exclusively my own and do not represent the opinions of any entity whatsoever with which I have been, am now or will be affiliated.