Shell: What and Why?
In this precursor to a full series of posts on how to use the shell command-line and write shell scripts, I am going to outline how to setup your computer ready to undertake these tasks. Let’s start with a quick overview of what a shell is, what it does, and why, as a data scientist or bioinformatician, you need to learn how to use a shell command-line interface.
In computing, a kernel is a program at the core of the computer operating system that connects the computer hardware and application software. The kernel generally has complete control over the entire system. A shell is a special program that forms the outermost layer around the operating system (hence the name) and interacts with the kernel to enable use of the operating system services by human users or other programs.
A user interacts with an operating system shell via either a command-line interface (CLI) or graphical user interface (GUI). For Unix and Unix-like operating systems (e.g. MacOS, Solaris, Linux and BSD derivatives etc.), users typically interact with a Unix shell via a CLI provided by a terminal application (e.g. Terminal on MacOS and Linux). The shell manages user–system interaction by prompting a user for input, interpreting this input, and then handling and relaying output from the underlying operating system.
Notice in the paragraph above I said “a Unix shell”. That’s because there are several Unix shells. Wikipedia has a list of system shells if you’re interested. Each command-line shell requires familiarity with specific commands and their calling syntax, as well as an understanding of shell-specific scripting language concepts. The Unix shell we’re interested in is BASh.
The name BASh is actually an acronym that stands for Bourne-Again Shell, a pun on the fact that it replaced the Bourne shell. Interestingly, this is the first and only example of computer nerds making really bad jokes. 🤥

So why do you, as a data scientist or bioinformatician, need to learn to use the BASh command-line interface or write BASh scripts?
BASh has been around since 1989 and has long been used as the default login shell for most Linux distributions, as well as all versions of MacOS prior to 2019. As a result of this long-standing tenure as the go-to Unix shell, most bioinformatics tools are written in BASh. So, there’s one reason.
Another reason you need to learn to use BASh is because most cloud-based and high-performance computing environments don’t have a GUI, and guess what’s used as the command-line interpreter in these environments? Training and deploying those resource-intensive machine learning models or analysing terabytes worth of next-generation sequencing data is not really going to be possible without a basic grasp of the BASh command-line. So, there’s another reason.
The third major reason is a matter of pragmatism and efficiency; it’s way faster and easier to manage system tasks, manage software and do repetitive routine jobs (e.g. bulk renaming files) using the command-line. Not to mention how powerful BASh tools and pipelines can be for data processing.
Finally, scripting means you can automate these processes. This also makes how you tackle these tasks traceable, reproducible and reusable, all best practices in data science and bioinformatics.
So now that you’re well and truly sold on learning to use BASh, let’s follow the steps outlined below and get your computer set up ready to do this.
Step 1: Update Your System
For MacOS you can hit “Cmd + spacebar” to open Spotlight, type “System Preferences”, open up the “Software Update” menu, and then follow the onscreen instructions to verify that you’re running the latest version of MacOS.
If you’re running Windows 10, you should probably just install a Linux sub-system such as Ubuntu. You can find plenty of good guides on how to setup a Linux environment on Windows 10 online; Google is your friend here.
For Linux, I am going to assume a Debian-based distribution such as Ubuntu. To ensure your Linux system is up to date, open up the Terminal application and run the following command:
sudo apt-get update && sudo apt-get upgrade -y
Now that everyone is either looking at a fully up-to-date version of MacOS or Linux, the setup instructions become much more homogenous.
We will predominantly be using Terminal for the rest of the setup process, so make sure you have a Terminal window open.
Step 2: Spare Your Eyesight
Upon opening Terminal for the first time, you will likely be greeted with a tiny window containing small black text and a bright white background. Awful! Customising the appearance of the Terminal by setting a more appropriate font size and background colour in the settings menu will make a tremendous difference to your eyes when using it for an extended period. Here is a snapshot of my Terminal window:
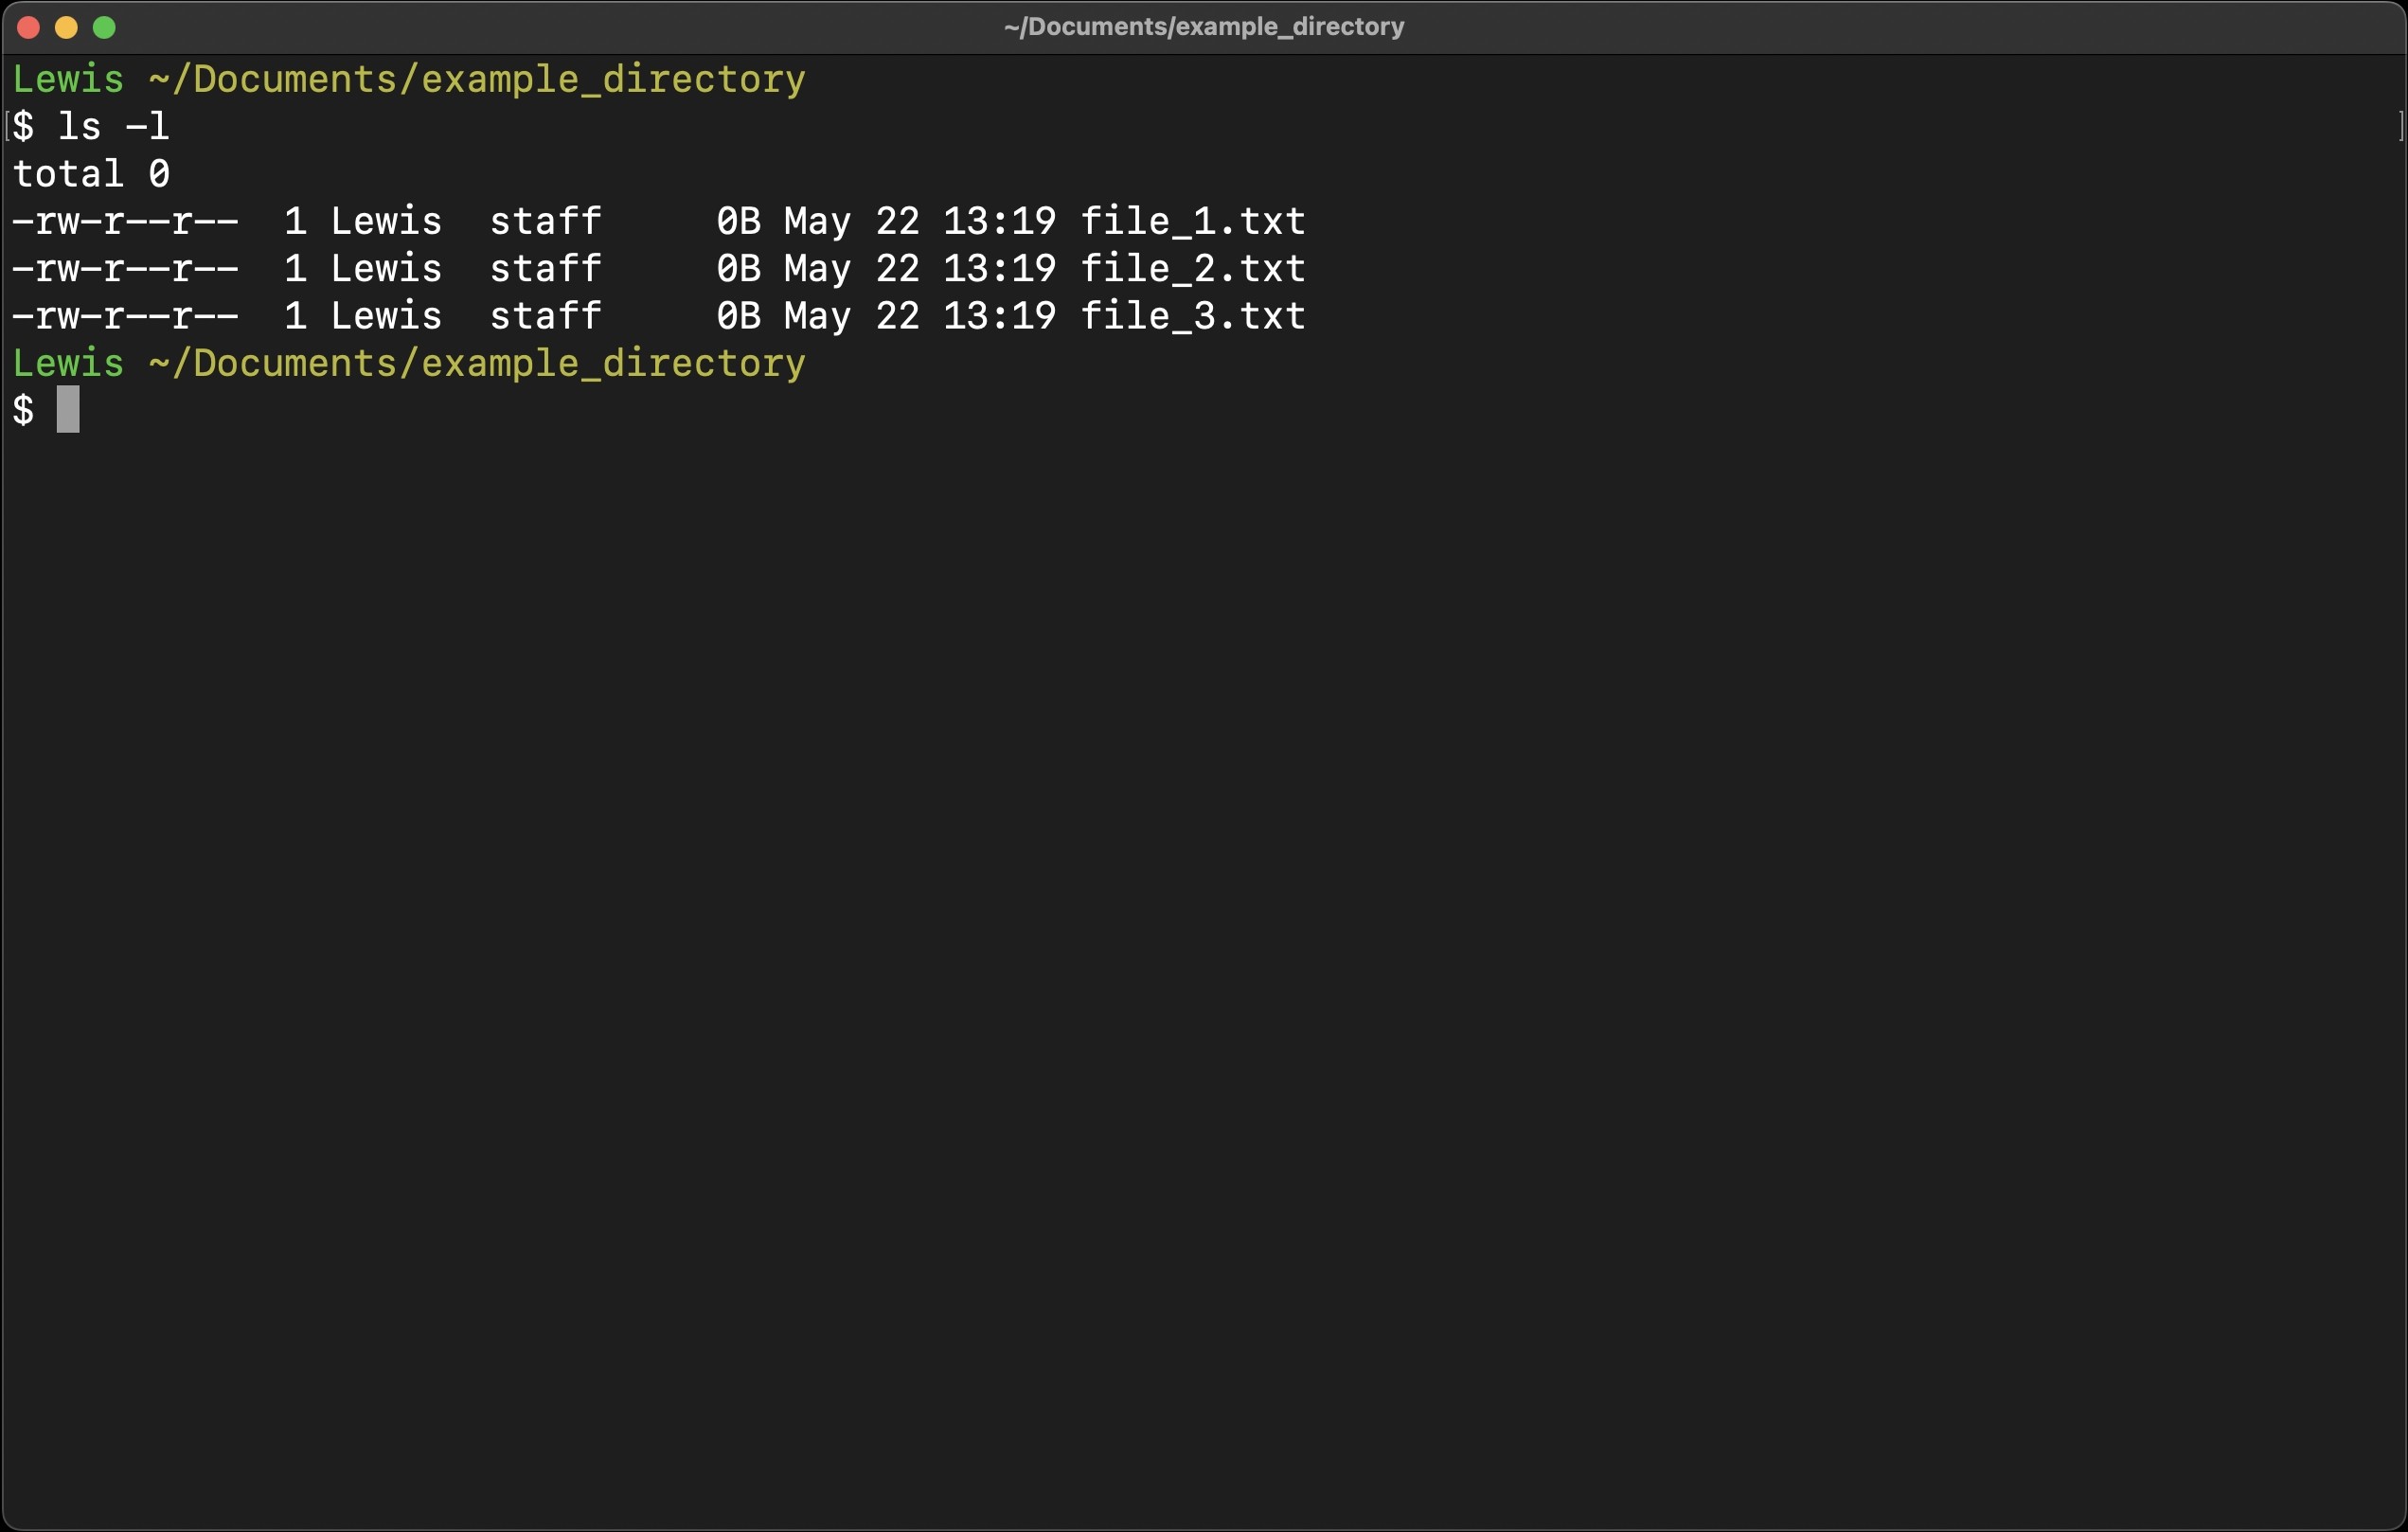
I have set a black background, SF Mono Regular font at size 14, changed the default window size to fill about 25% of my screen when it opens (I usually use it tiled to half of my screen anyway) and removed all of the default options for showing processes and paths in the window title. We will specify settings for showing the working path and automatic terminal text colourisation in Step 4. Otherwise, the choice of background colour, font and window size settings are entirely personal preference. Experiment to find something that works for you.
Step 3: Make Sure You’re Running BASh
BASh should be the default login shell for anyone running Linux. For those of you running MacOS, the default login shell changed to Z shell (Zsh) from MacOS 10.15 Catalina, so you will have to set the default shell to BASh. To do this run the following command:
chsh -s /bin/bash
Upon running this, you will be prompted to enter your user password. Once you have done this, close the Terminal window and reopen it. You will now be using BASh instead of Zsh. You will also likely be greeted with the following warning:
The default interactive shell is now zsh.
To update your account to use zsh, please run `chsh -s /bin/zsh`.
For more details, please visit https://support.apple.com/kb/HT208050.
Ignore this for now, we will permanently silence it shortly.
Step 4: Setup Your BASh Profile
Shell profiles are basically files containing configuration commands that are processed and applied when a shell is initialised. For various reasons, multiple files can contain shell configurations. There are rules regarding which of these settings are applied and when. For further reading on this topic, you can read the bash manual page by running man bash. I don’t recommend you waste time on this, just know that we are concerned with two files that must have specific names and must be located in the home directory: .bash_profile and .bashrc.
We will set these up so that .bash_profile will automatically load the file .bashrc; this will be the main shell profile file that you will use and should therefore contain all your shell related settings.
First, let’s setup the .bash_profile. Open or create the .bash_profile file using the nano text editor by running nano ~/.bash_profile. Now paste the following into the newly opened nano text editor window, including the comment line:
# source settings from .bashrc

if [ -f ~/.bashrc ]; then
   source ~/.bashrc
fi
Now hit “Ctrl + O” to write-out the changes, hit “Return” to confirm the file name, and then “Ctrl + X” to close the nano editor.
The command we inserted into .bash_profile loads .bashrc (if it exists) when the .bash_profile is loaded. You shouldn’t need to look at the .bash_profile file again.
Now let’s setup the .bashrc. Create a new .bashrc file using the nano text editor again by running nano ~/.bashrc. Now paste the following into the nano editor window:
## custom .bashrc

# turn off zsh warning
export BASH_SILENCE_DEPRECATION_WARNING=1

# extend the program search PATH
export PATH=~/bin:$PATH

# make command prompt more user friendly: colours, hostname, path, etc
export PS1='\[\e]0;\w\a\]\[\e[32m\]\u \[\e[33m\]\w\[\e[0m\]\n\$ '

# necessary for the command line sort to work correctly
export LC_ALL=C

# ls uses different flags for colours on Mac and Linux
if [ "$(uname)" == "Darwin" ]; then
  alias ls="ls -hGF"
else
  alias ls="ls -h --color"
fi

# safe versions of default commands - will ask permissions before overwriting files
alias rm="rm -i"
alias mv="mv -i"
alias cp="cp -i"
If you really want your hostname in the prompt, or you want automatic new lines for each command, you can replace the line that defines the PS1 variable in the above for any one of the following:
# Add hostname only - no auto new line
export PS1='\[\e]0;\w\a\]\[\e[32m\]\u@\h \[\e[33m\]\w\[\e[0m\]\n\$ '

# Add auto new line only - no hostname
export PS1='\[\e]0;\w\a\]\n\[\e[32m\]\u \[\e[33m\]\w\[\e[0m\]\n\$ '

# Add both hostname and auto new line
export PS1='\[\e]0;\w\a\]\n\[\e[32m\]\u@\h \[\e[33m\]\w\[\e[0m\]\n\$ '
You can customise your .bashrc beyond the minimal settings we have defined here. For example, in my .bash_rc file I have separate sections (delineated by comment headers) where I have defined aliases to make my life easier, such as for SSH, SSHFS and remote login, as well as definitions required for package and environment management programs; a topic we will visit in future posts. I have also set a couple of customised versions of default commands, as shown below. Feel free to steal these while your .bashrc is open in nano.
# customised versions of default commands
alias mkdir="mkdir -p"
alias ll="ls -l"
Now that we are done customising the .bashrc, lets save it: hit “Ctrl + O” to write-out the changes, hit “Return” to confirm the file name, and then “Ctrl + X” to close the nano editor.
The newly defined settings will not automatically be applied; new terminal sessions will use new settings, but existing terminal windows need to be instructed to apply the new settings. You can apply your new customised bash profile by either closing and reopening your terminal, or by running the command source ~/.bashrc.
Step 5: Install Homebrew (MacOS Only)
Homebrew is an open-source package manager for MacOS that makes installing and maintaining software extremely simple. We will also use this shortly to install a couple of bits of useful software.
The Homebrew site provides an installation script you can download and run with a single command:
/bin/bash -c "$(curl -fsSL https://raw.githubusercontent.com/Homebrew/install/HEAD/install.sh)"
You will again be prompted for your user password. Enter it and follow the onscreen messages shown in the Terminal window.
If you haven’t already installed XCode Command Line Tools, you will see a message during the Homebrew installation process that indicates that these will be installed. Press “Return” to continue when prompted. It should only take a couple of minutes to download and install XCode Command Line Tools if you’ve got a newer Mac and reasonable internet connection. It took about 1 minute to do this on my 2021 MacBook Pro with the Apple M1 Pro chip.
If you run into problems (like I did running this on my old 2014 Macbook Air) you may have to install XCode Command Line Tools manually. The first thing is to stop the Homebrew install if it hangs using “Ctrl + C”. You can then attempt to install using this command:
xcode-select --install
If this also hangs (like it did on my old 2014 Macbook Air) then you can again cancel the install using “Ctrl + C” and run the package installer after downloading it from the Apple Developer site. You need to look for version 13.2 for MacOS Big Sur or 13.4 (at the time of writing) for MacOS Monterey; the age of your hardware will dictate the most up-to-date version of the operating system you will have after Step 1.
Once you have XCode Command Line Tools installed, re-run the Homebrew installation script using the command above.
Now let’s make sure that Homebrew is fully updated and ready to use by running the following commands:
# update the Homebrew package manager
brew update

# upgrade all individual packages and formulae
brew upgrade

# check for potential issues
brew doctor
If you are informed of outstanding issues, read the screen and do as it Homebrew indicates, then rerun the brew doctor command. Repeat this process until you receive the message “Your system is ready to brew”.
Note: If your Mac has an Apple Silicon chip, the final step you need to undertake is to reopen your .bashrc file using nano ~/.bashrc and below the line that reads “export PATH=~/bin:$PATH” paste the following:
export PATH="/opt/homebrew/bin:$PATH"
This is because Homebrew files are installed into the “/opt/homebrew” directory on newer non-intel Mac systems, but this is not part of the default search path defined by the $PATH variable, which basically specifies where BASh looks for all the program files for the commands you run in BASh. Inserting the above into the .bashrc file rectifies this issue.
Step 6: Install wget
Wget is an open-source software package for retrieving files using all the common transfer protocols (HTTP, HTTPS, FTP and FTPS). It has a very basic calling syntax, is non-interactive, and is designed specifically for robustness over slow or unstable network connections. This makes it easy and fast to use and both convenient and reliable for large-scale data transfer.
To install wget run either of the following, depending on your system:
# MacOS
brew install wget

# Linux
sudo apt-get install wget
Most Linux distributions should already come with wget but there’s no harm in double checking. To check that it installed on either system you can run wget --version. We will certainly use wget at some point in future tutorials, so it is worth installing it now.
Step 7: Install Git
Git should need no introduction; I have written an entire series on how to install and use Git. For those of you reading who may have missed this, you can install Git using either of the following, depending on your system:
# MacOS
brew install git

# Linux
sudo apt install git-all
Start here to follow my series of posts about Git and learn how to implement version control workflows for your data science and bioinformatics projects.
Step 8: Put the Kettle On
That’s enough system setup for today. If you have followed this post then your system should be ready for future tutorials on how to use the BASh command-line and write BASh scripts, without the risk of encountering problems or damaging your eyesight.
The steps we have covered today also lay the foundations for any number of other command-line-related tasks, such as installing and using the Conda package and environment management system; a topic that is relevant whether you’re a data scientist wanting to run analyses in Python, or a Bioinformatician wanting to build and run next-generation sequencing pipelines on a high-performance computing cluster. I have posts on all these topics and many more planned. Stay tuned.
Thanks for reading. I hope you enjoyed the article and that it helps you to get a job done more quickly or inspires you to further your data science journey. Please do let me know if there’s anything you want me to cover in future posts.
Happy Data Analysis!
Disclaimer: All views expressed on this site are exclusively my own and do not represent the opinions of any entity whatsoever with which I have been, am now or will be affiliated.