GitHub
So far in this series we have covered all the skills required to implement basic version control workflows locally using Git. In this post, we are going to cover the final element of the Git workflow that I described at the outset: working with remote repositories using GitHub. If you haven’t yet covered the previous posts in the series, you can link out to them from here.
 At the end of this post, complete your basic Git training you will!
GitHub is an online code hosting platform for version control that enables project portability and scalable remote collaboration. Hosting your code on GitHub enables you to access, modify and manage projects on any computer that has internet access. It also enables code distribution, aids code deployment through continuous integration/continuous deployment (CI/CD) and acts as a backup from which it is possible to revert projects to previous versions.
Using GitHub is particularly important for facilitating collaborative development, a common scenario for academic or industry professionals and those contributing to open-source projects. It is also a powerful tool to showcase your skill set; your GitHub account allows potential employers to see skills you currently possess, the projects you’ve worked on, and your ability to write code and document the development process. Feel free to checkout my GitHub account for a basic example.
Git Started with GitHub
Let’s assume that, having followed the previous posts in the series, you have setup a local project repository to which you have added and committed some changes, and you now want to push these to a remote repository hosted on GitHub.
The first thing you will need to do is visit GitHub.com and create an account by clicking the “Sign up” button at the top-right of the GitHub home page:
 Click to Zoom
Once you have completed the registration form, which is short and self-explanatory, you will be greeted with the homepage. Click on the profile image button in the top-right corner and select the “your repositories” option from the dropdown menu:
 Click to Zoom
The next page you will be taken to will be the repositories page of your newly created user profile. In order to create your first GitHub repository, select the “new” button in the top right-hand corner:
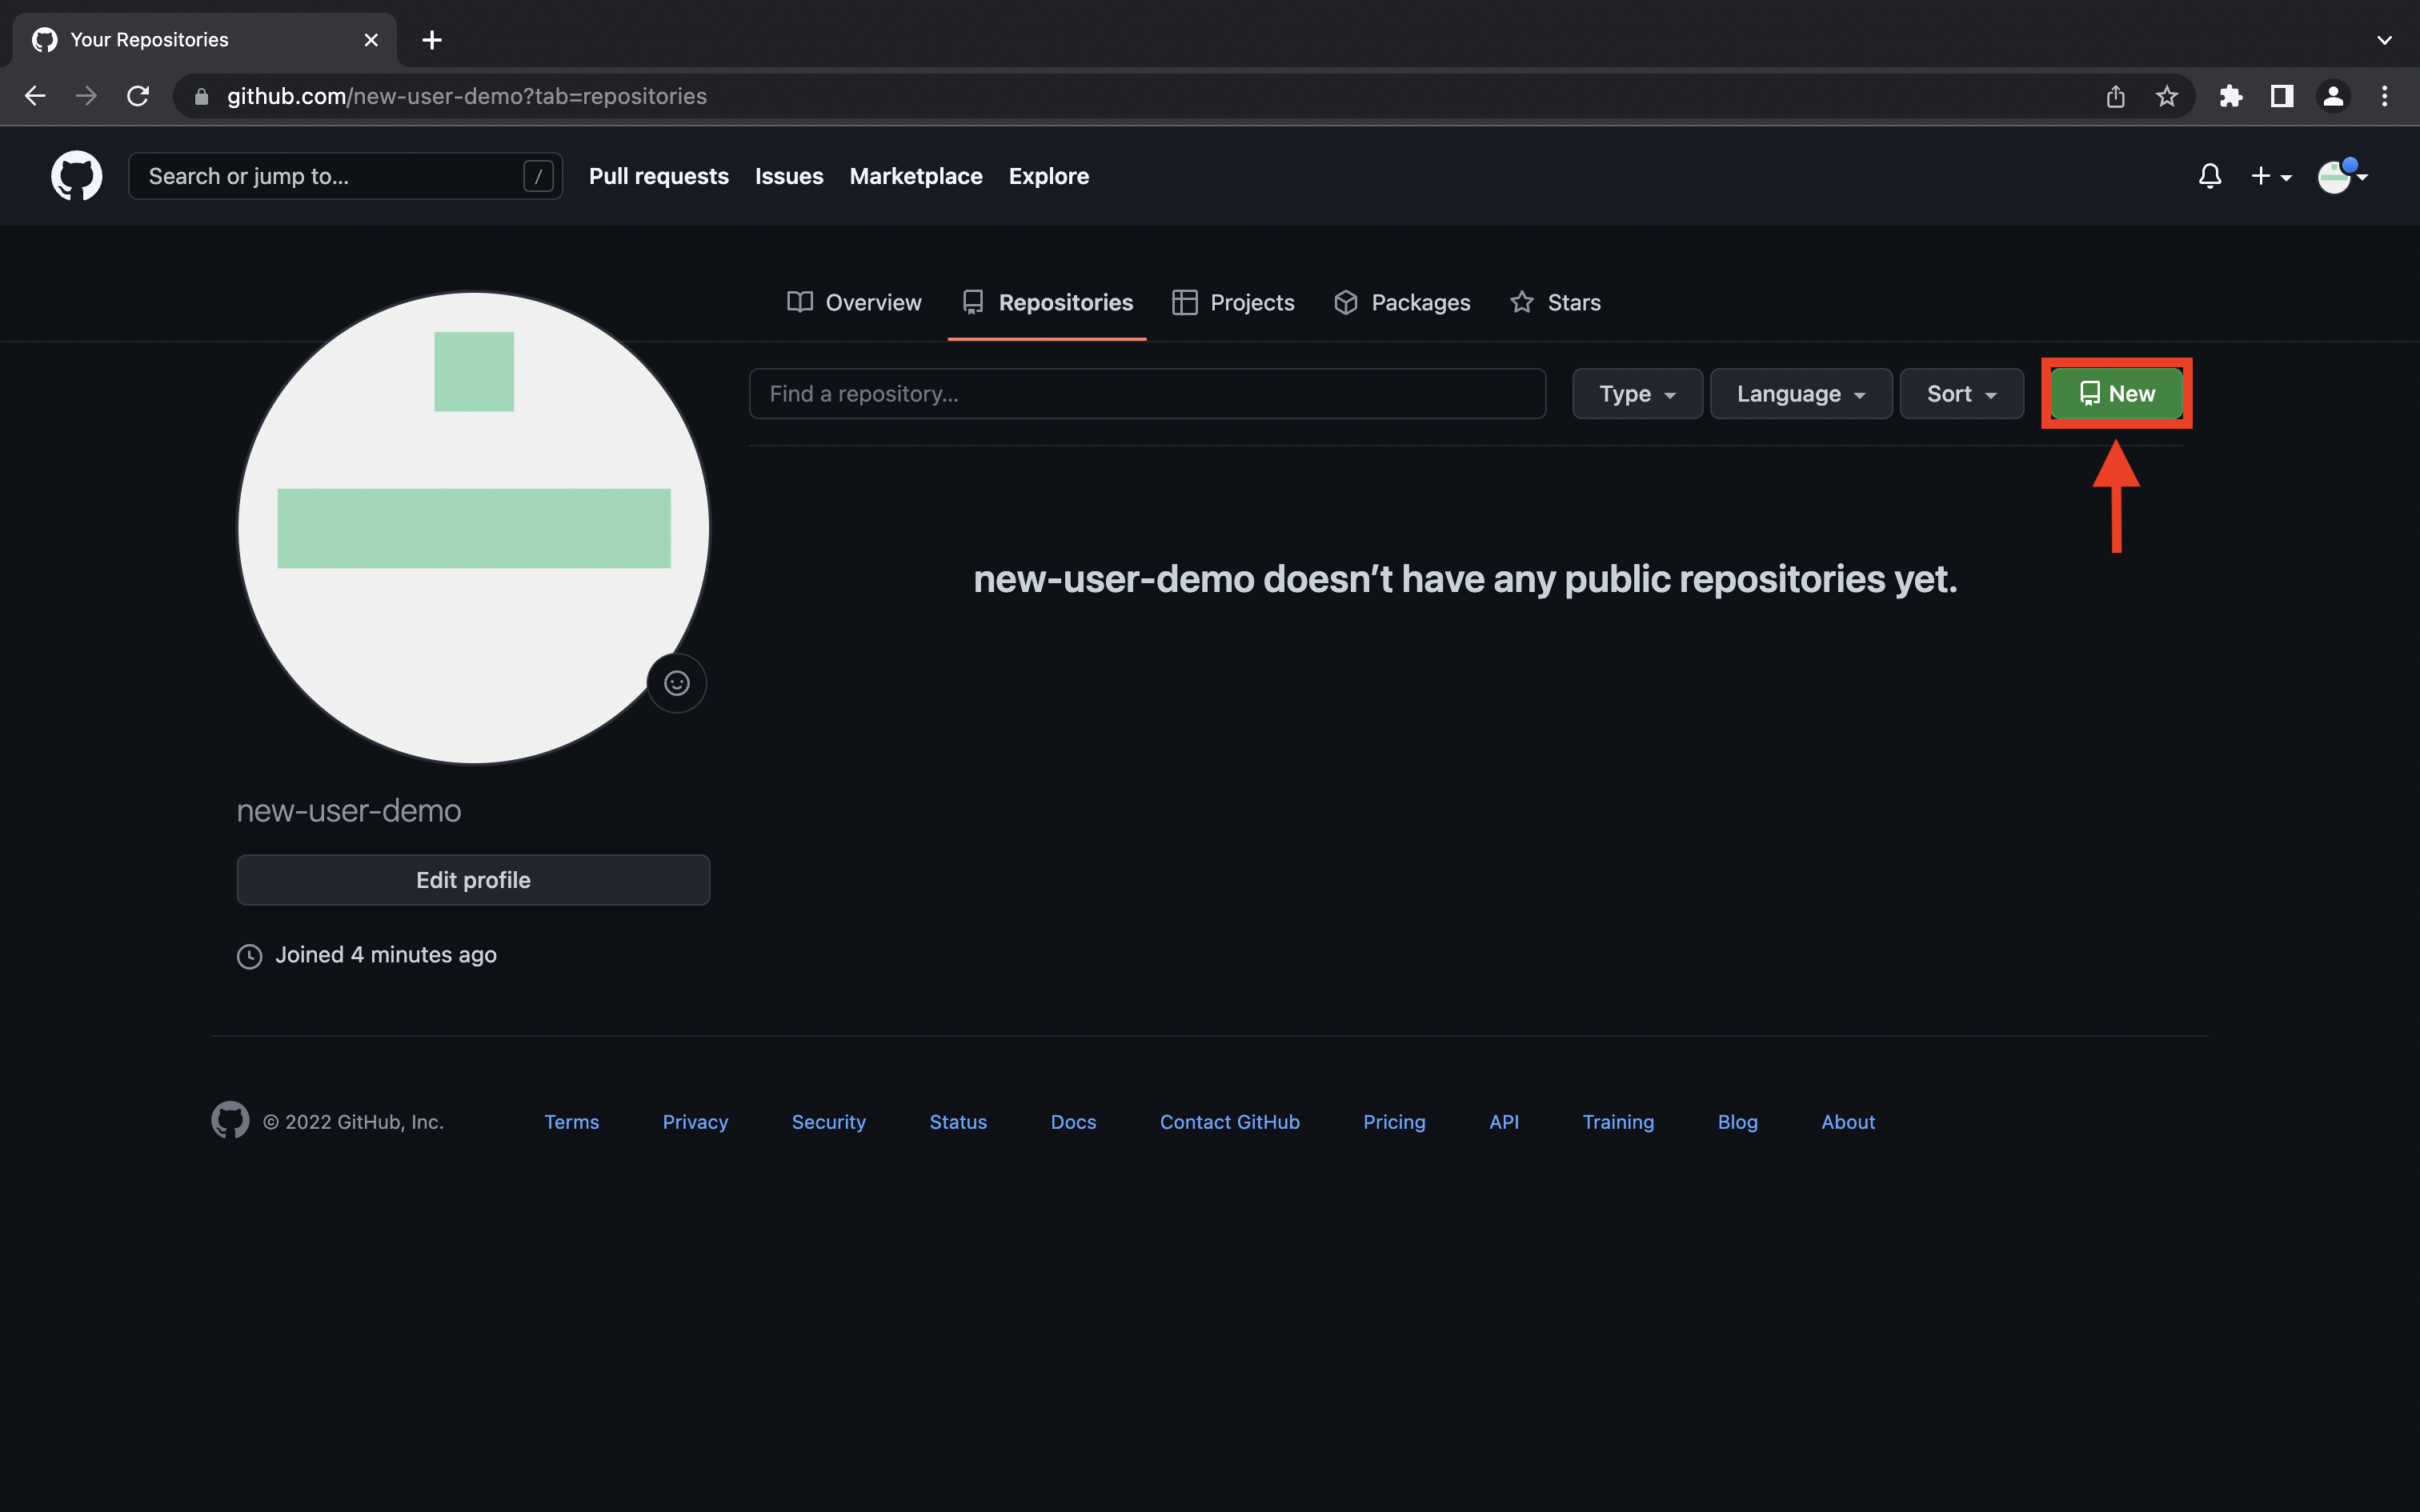 Click to Zoom
On the repository creation page, you can enter a repository name and description, set access permissions, and add README.md, LICENSE.md and .gitignore files. You can follow the links on the page to learn more about each of these, although we have already covered .gitignore files previously.
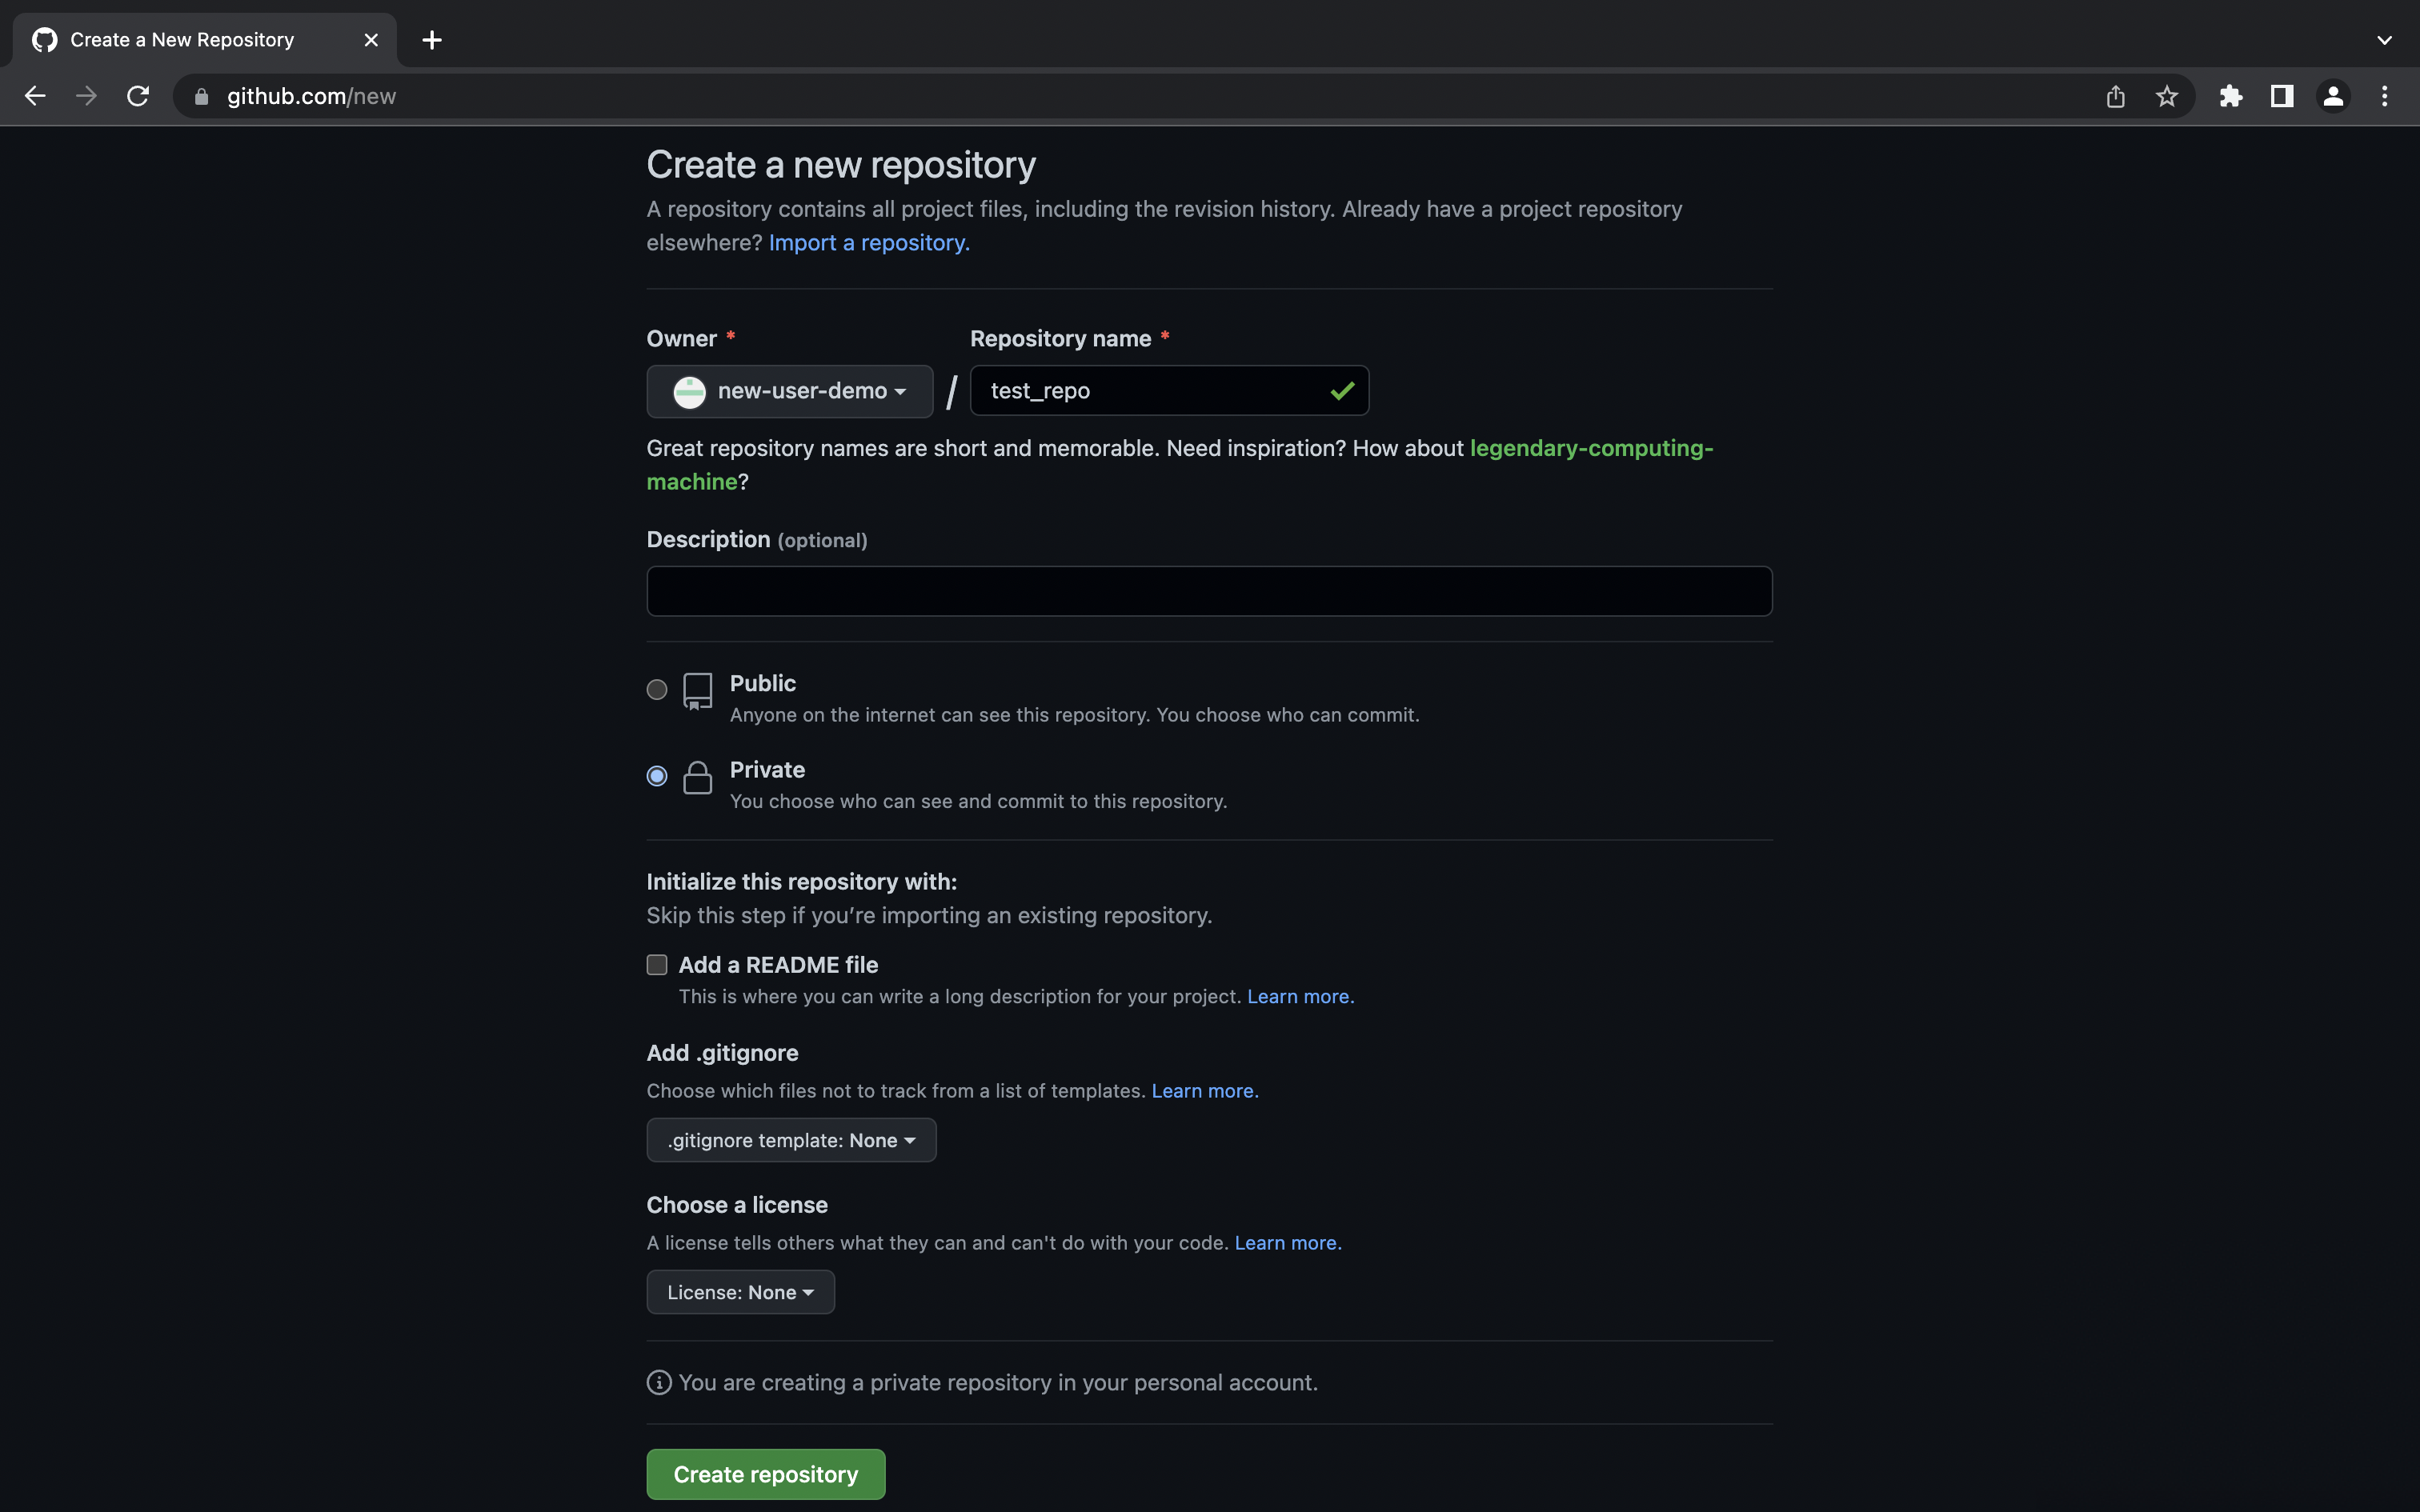 Click to Zoom
As a rule of thumb, you should name your repository using an abbreviated descriptor of the project; it should be short and simple. Once you’re done, click the “create repository” button at the bottom of the page and you will land on the repository setup page:
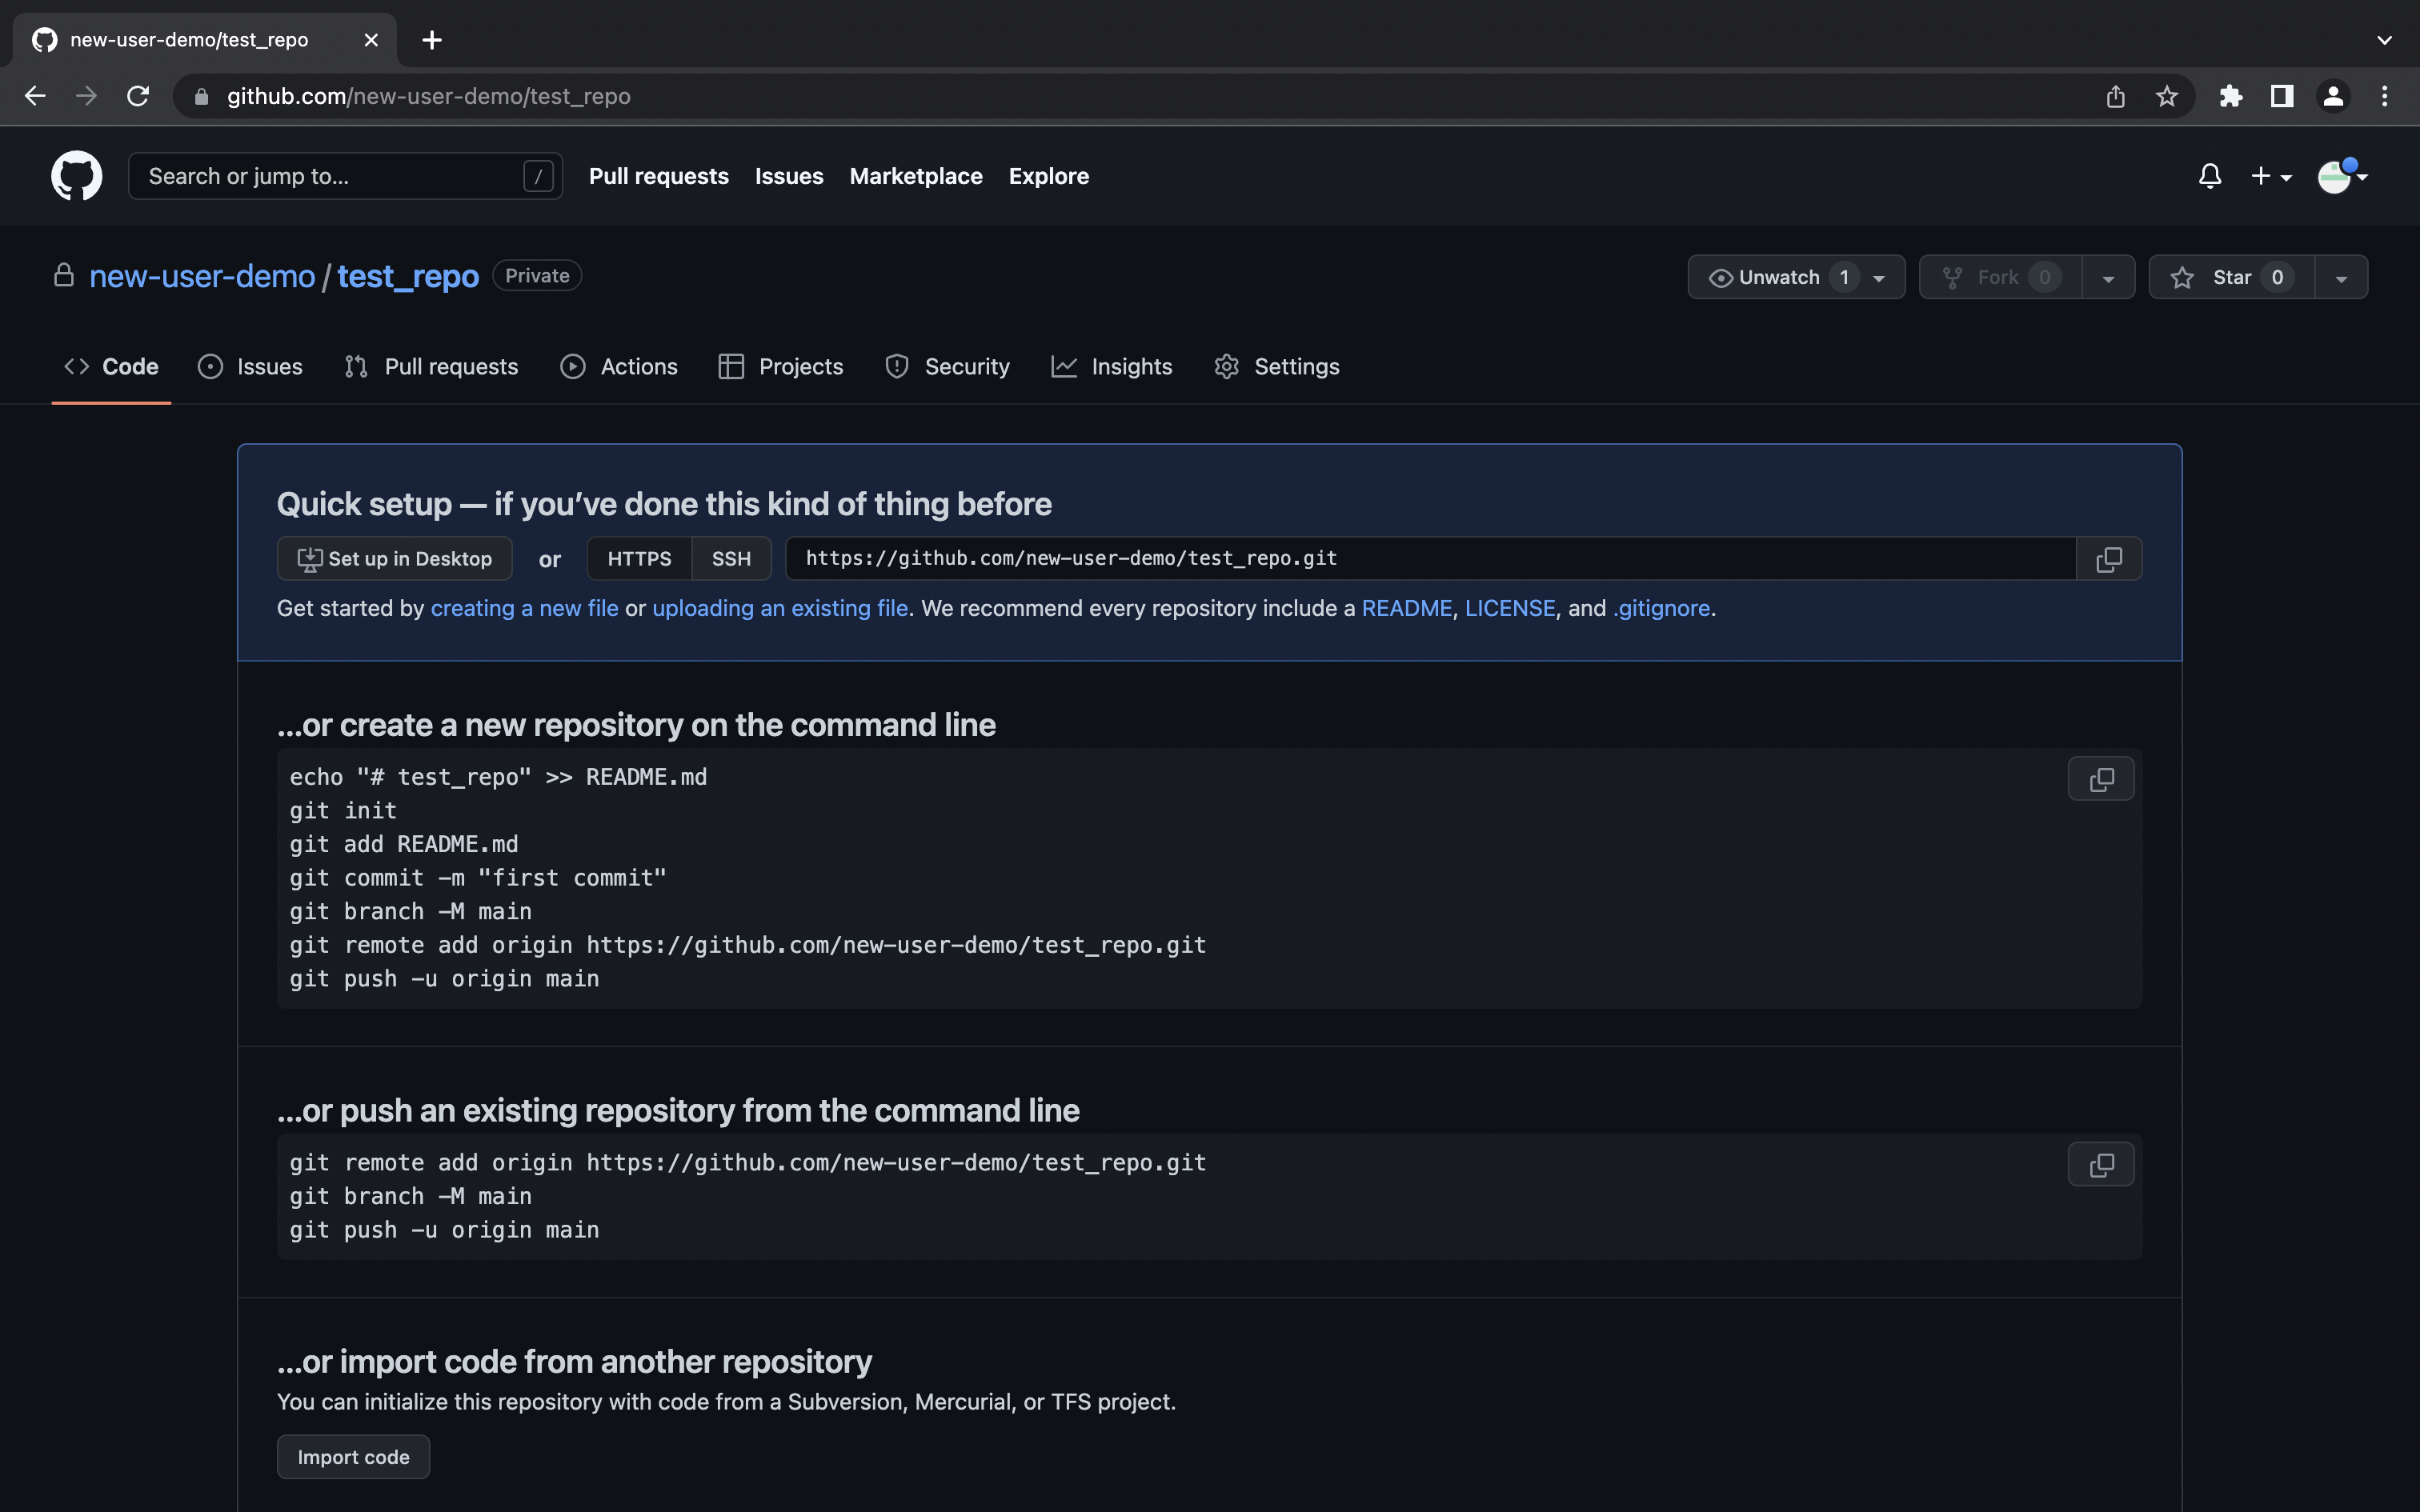 Click to Zoom
As you can see, the repository setup page itself provides instructions for how to push a Git repository from the command line. Don’t rush off to follow those instructions just yet though, we first need to decide on and configure options for connecting to remote repositories on GitHub.
Connecting to GitHub Repositories
When connecting to remote repositories on GitHub, you have two connection options: HTTPS or SSH. Without getting too in-depth with the pros and cons of each, let’s quickly cover the two main considerations when deciding on which one to use.
Security Considerations
It’s a common misconception that the HTTPS protocol itself is significantly less secure than SSH; both protocols provide a secure connection safe from man-in-the-middle attacks, both use public-key based authentication and do the same job if the underlying keys are kept secure, and both protocols can be configured to use multi-factor authentication (MFA). The main difference between the two in this case is that, when used with Git, HTTPS will send your password over the wire while SSH will not; when using SSH, you give GitHub your public key and use your private key (stored as a file on your hard drive) to perform authentication.
Practicality Considerations
While GitHub and the repository setup page itself default to the HTTPS protocol, using HTTPS isn’t as simple as it used to be. As of August 2021, GitHub disabled using your account password to authenticate a connection, meaning that you need create a Personal Access Token. The main drawback of using HTTPS with GitHub is that this token is not cached permanently so you must enter it each time you want to make a push. With SSH, this is not the case as it just uses the key file on disk each time. While SSH does have plenty of downsides (such as juggling multiple SSH keys for use of multiple devices), they can be mitigated if you know what you’re doing, and setup only requires a few commands and a couple of clicks in the GitHub settings.
TL;DR
If you’re just looking for an easy experience, HTTPS is secure as long as your password is secure, but it can be tedious to use. SSH means no faffing with passwords after a one-time configuration and works better with MFA. As time-efficiency and security are bywords round these parts, SSH is what we’re going to use.
In the name of efficiency, there’s no point me reinventing the wheel here: GitHub has a series of comprehensive guides that cover how to setup for using SSH keys. That said, their pages can be a bit confusing to navigate at times due to the sheer volume of information, so I have included a shortlist of links below for you to follow:
1) Checking for existing SSH keys
2) Generating a new SSH key and adding it to the ssh-agent - only cover the three following sections:
3) Adding a new SSH key to your GitHub account
If you follow these links in order, adhere to the instructions exactly, and use the commands provided, then you will quickly be ready to go with SSH. Once that’s done, head back to the repository setup page we left at the end of the last section.
Pushing a Commit
Select the SSH option on the repository setup page and copy the URL; this will have a general structure similar to the one shown below, with user being replaced with your username and repository_name being replaced with the name of the repository that you made earlier.
git@github.com:user/repository_name.git
Presuming that you have already initialised a project repository and have some changes (along with a sensible commit message) ready to push, the instructions are basically the same as those listed on the repository setup page under “…or push an existing repository from the command line” with a couple of minor modifications.
First, make sure that the Git repository you want to push changes from is your current working directory and then ensure that the default branch is renamed to “main” if you have not configured this behaviour already.
# force rename of the default "master" branch to "main"
git branch -M main
Now, we can add the remote repository URL to the Git repository and then check that this has worked as expected; make sure you replace user and repository_name accordingly.
# add the remote repository
git remote add origin git@github.com:user/repository_name.git

# sanity check that the correct remote has been set
git remote -v
Running the second command should result in an output comparable to the one shown below:
origin  git@github.com:user/repository_name.git (fetch)
origin  git@github.com:user/repository_name.git (push)
Finally, you can push the changes you have made by running the following command:
# push commits to remote repository
git push -u origin main
Upon running this command, you should receive an output similar to the one shown here:
Enumerating objects: 10, done.
Counting objects: 100% (10/10), done.
Delta compression using up to 8 threads
Compressing objects: 100% (8/8), done.
Writing objects: 100% (10/10), 200.88 MiB | 2.20 MiB/s, done.
Total 10 (delta 0), reused 0 (delta 0), pack-reused 0
To github.com:user/repository_name.git
   3de0a2d..7f67c25  main -> main
branch 'main' set up to track 'origin/main'.
Now that the remote for your repository is configured and working, all you will need to do in future is stage, commit and push changes. Easy.
One final thing to note in terms of GitHub remote repositories is that GitHub blocks pushes that exceed 100MB and each GitHub repository has a space limit that must not exceed a maximum threshold of 2GB for free and pro accounts. If you’re working on a project that produces many or large results files, it’s best to avoid uploading them to GitHub. Instead, you could upload them to cloud storage such as an AWS S3 bucket or equivalent. If, for whatever reason, you do want to track larger files using GitHub, you can consult the Git Large File Storage information page for how to do so.
Cloning a Remote Repository
In instances where you inherit a project from someone else, join a collaborative or open-source project, or where you just want to continue working on one of your own projects on a computer other than your usual machine, you will need to clone an existing repository instead of creating a new one. Cloning a repository does exactly what the name suggests; it creates a copy of an existing repository (including all of its history) and allows you to download it to your local computer.
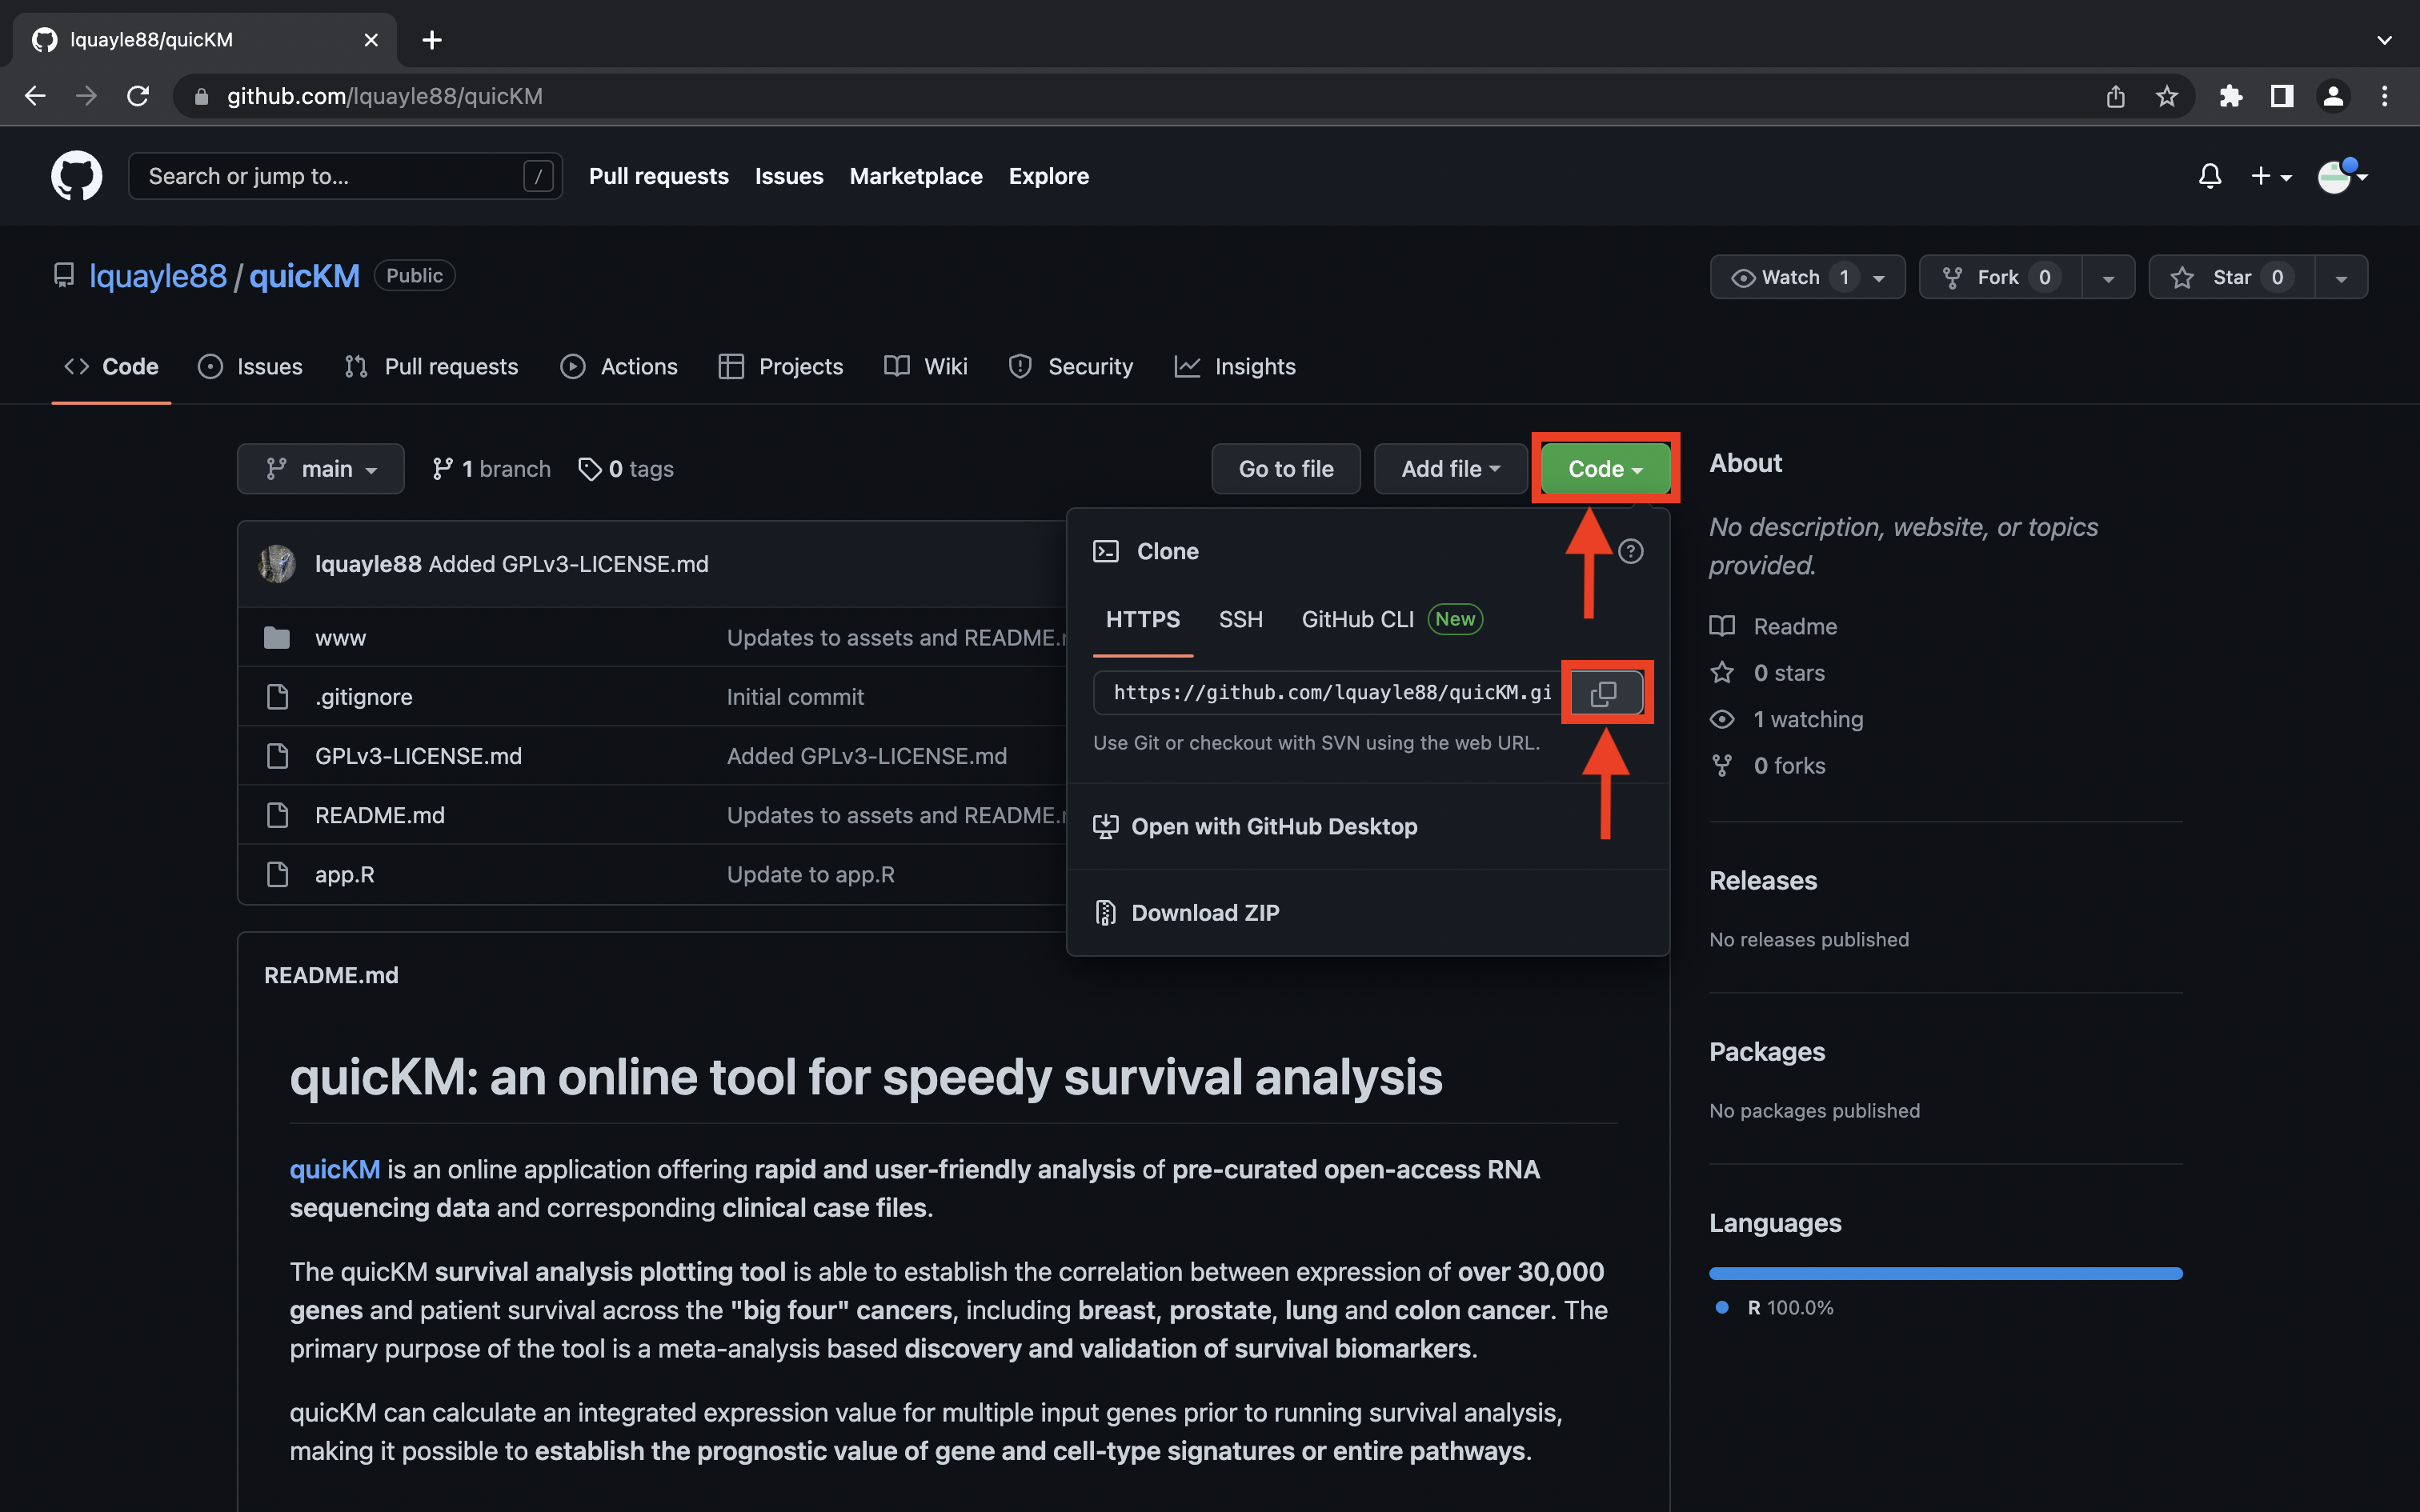
In order to clone a remote repository, you will first need the repository URL. This can be found on GitHub by clicking on the “code” button on the repository homepage and copying the URL under the HTTPS or SSH section. I have shown an example of this below using one of my own public access GitHub repositories:
 Click to Zoom
To clone a repository, you can run the command shown below, replacing <url> with the actual URL for the remote repository you want to clone. Note that, if you want to clone a local repository, you can simply use the path to that directory in place of a URL.
# clone an existing remote repository
git clone <url>
Running the git clone command will clone the repository specified to your current working directory and will use the name of the existing repository as the name of the clone root directory. If you want to rename the clone, append the new directory name to the command, as shown:
# clone an existing remote repository and rename the clone
git clone <url> <new_dir_name>
When you a clone a repository, Git stores the original remote URL (or file path if cloning a local repository) in the new repository’s configuration. For a typical workflow, such as when working on a project on a different machine, the remote that is defined will allow changes to be pushed back to the same remote. If you ever need to redefine remotes, you can use the commands shown below, replacing <remote_name> and <url> as appropriate.
# remove remote repository association
git remote rm <remote_name>

# add a remote repository association
git remote add <remote_name> <url>
The latter command is a generic version of exactly the same command we used previously to define a remote GitHub repository association.
Pulling Changes
Just as we have learned how to push changes to a remote repository, it is also possible to pull changes that have been pushed to a remote repository by other users. It is best practice to check the status of a repository and pull in any changes made by collaborators prior to undertaking any work on a project repository. You can then make your changes without overwriting other’s work or causing conflicts before pushing your changes back to the remote so that your collaborators have access to them. In instances such as this, Git will not allow you to push changes to a remote repository unless you have already merged the contents of the remote repository into your own.
Pulling changes is pretty straightforward; running the command shown below will pull in all changes from the specific branch of the remote that is defined in the command and merge them into the current branch of your local repository.
# pull changes from remote repository
git pull <remote_name> <branch_name>
In the previous post in the series we learned that Git will stop you from switching branches when you have unsaved work. Git also stops you from pulling in changes from a remote repository when doing so might overwrite things you have done locally. To resolve this issue, simply either commit your local changes or revert them before re-attempting the pull.
git --review
In this post, the final in my basic version control with Git series, we have covered how to setup a GitHub account and SSH keys, how to create, configure and clone remote repositories, and how to push to and pull from these remote repositories. You are now fully equipped with the fundamental skills required to implement version control workflows for your projects. Congratulations!
Of course, there are many commands and more advanced features I have not covered. The good news is that Git is a very well documented resource, even beyond the countless blog posts and YouTube tutorials on basic usage. If you’re feeling stuck or want to learn some of these more advanced features, I would highly recommend using the Git reference manual. In addition, the entire book “Pro Git”, written by Scott Chacon and Ben Straub, is freely available online here.
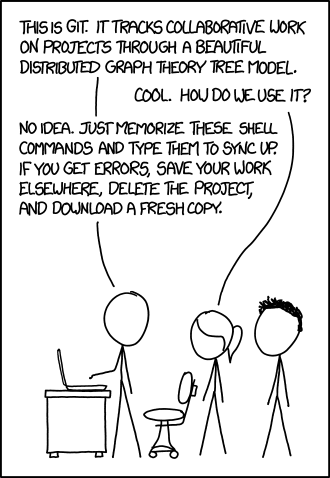 Real world Git usage…
Thanks for reading. I hope you enjoyed the article and that it helps you to get a job done more quickly or inspires you to further your data science journey. Please do let me know if there’s anything you want me to cover in future posts.
Happy Data Analysis!
Disclaimer: All views expressed on this site are exclusively my own and do not represent the opinions of any entity whatsoever with which I have been, am now or will be affiliated.